3DPrinting

15605 readers
229 users here now

3DPrinting is a place where makers of all skill levels and walks of life can learn about and discuss 3D printing and development of 3D printed parts and devices.

The r/functionalprint community is now located at: [email protected] or [email protected]

There are CAD communities available at: [email protected] or [email protected]

Rules

If you need an easy way to host pictures, https://catbox.moe may be an option. Be ethical about what you post and donate if you are able or use this a lot. It is just an individual hosting content, not a company. The image embedding syntax for Lemmy is ![](URL)

Moderation policy: Light, mostly invisible

founded 1 year ago
MODERATORS
1


In the process of refining the design for my 3D printed glasses (yes, I'm still at it 🙂) and trying to streamline the lens ordering process a bit, because some folks have told me their optician, or their optician's lens supplier, didn't really want to mess with "unusual" things like this, I decided to draw and print a fake ophthalmic lens. You know, not optical-quality - or even see-through - but something that looks and feels like a lens, that can be mounted in my frames, to show an optician hands-on how it works and that it's not weird or delicate to work on.

I figured it would be a quick print in clear PLA, that would require only a bit of cleanup and mount right into the frames, complete with the bevel and the notch and everything. How wrong I was...

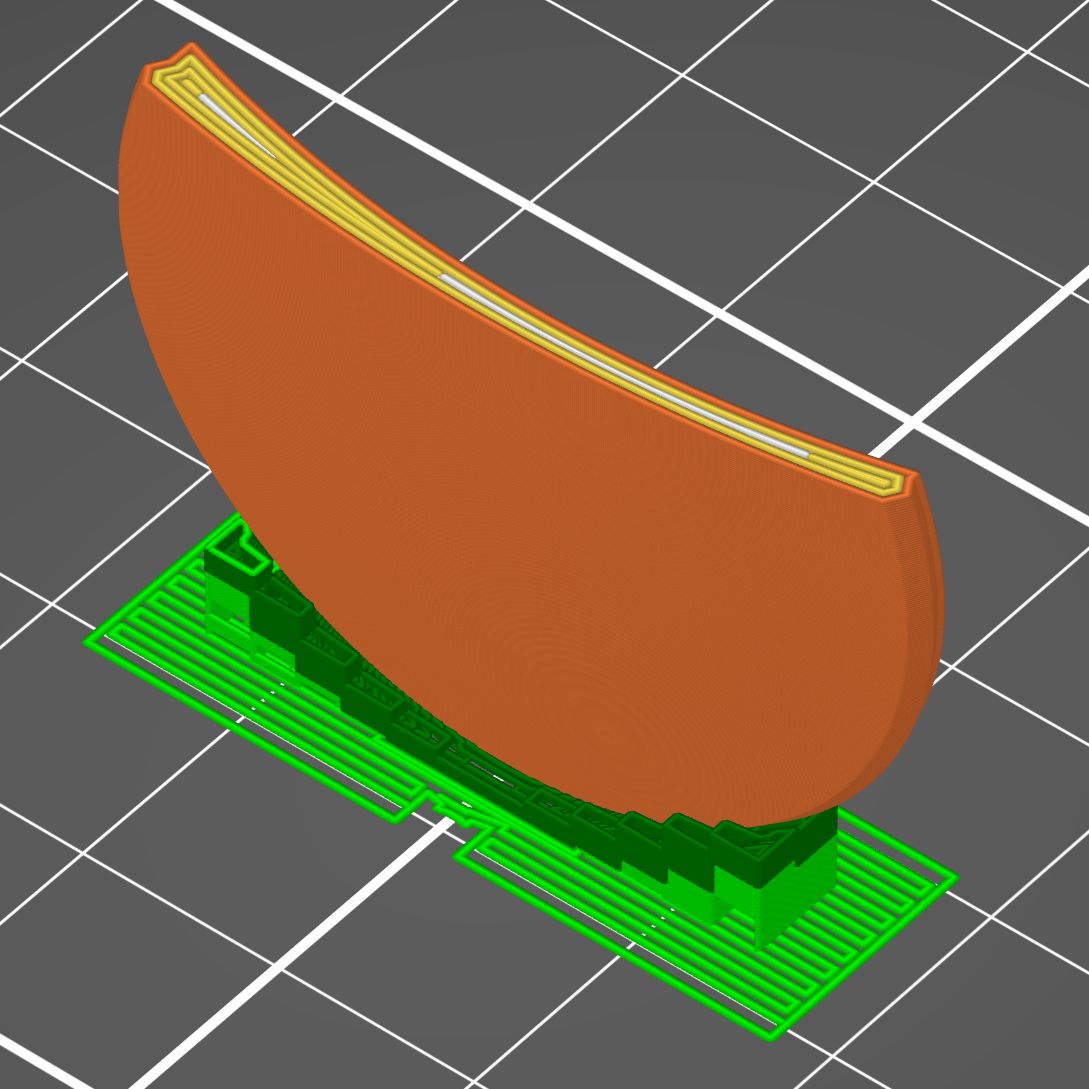
This part is almost impossible to print right:

  • It's modeled after a real bispherical lens with an offset optical axis. I mean it's optically incorrect, but it has everything a real lens would have: uneven edge thickness, one convex and one concave side.

    You just can't set it flat on the bed in the slicer: none of it sits flat. The slicer has trouble generating support around the edge on the concave side that it interprets half of as overhang, and even if the beginning of the support doesn't get ripped off by the head and the print completes, the surfaces will be absolutely awful.

  • If you print it vertical - which frankly is the least bad option - then the bottom of the lens, under the support, will be a complete mess. The bevel won't even be visible. It takes quite some time to create supports that won't mess up the bottom of the lens too much

  • If you print it in clear PLA with only perimeters, it'll be transparent enough to see the spots were the perimeters are started at the next layer. And depending on your wall generation strategy, the spots where the printer tries to fill the voids will show up as round "halos" inside the lens.

    The lens' thickness varies everywhere, so the slicer tries its best to fill each layer, but it's slightly different at every layer. At any rate, it reveals the slicer's idiosyncracies in tool path stragegy right away.

  • The bevel all around the lens is only 0.5mm high. If the printer is dialed in, the bevel will show as an actual 120-degree bevel near the front face of the lens, particular where the bevel is normal to the layer, about half-way up the lens if you print it vertically. If not, it will look like a barely-raised blob.

I've tried this print on 3 different printer and I just can't get a decent print. All I can do is play with the settings in the slicer until it comes out not too terrible.

So, that part is a bit frustrating for my original purpose, but it turns out to be a great part to test a printer and/or the slicer software! If you want to try it too, it's here:

https://github.com/Giraut/3D-printed_eyeglasses/raw/refs/heads/main/lens_example.3mf

2


Which is to say, not very far on this at all but I think I have a good idea on how have my cake and eat it too for desiccant for my spools.

I am finding I can't get the humidity below about 50% in my AMS and the silica I am using needs constant refreshing.

Well it seems there is stuff called activated alumina that is pretty good and honestly about the same costs as silica beads, but I need to be able to put it in the oven to refresh it. Which doesn't work well with my 3d printed desiccant holders.

Insert, cheap tea strainers.
It seems I can get ones that are 4cm in width by 6cm in height that are made out of stainless steel that I can actually put straight in the oven.

So, I am working on getting the parts and items but was wondering if anyone else has done this or have any suggestions before I start grabbing stuff?

3
2
submitted 3 hours ago* (last edited 2 hours ago) by [email protected] to c/[email protected]


I found a small length of filament in the parts bin. I don't know what it is, and nobody else here does, or remembers ordering it. I'm pretty sure it's a sample that was sent by Prusa when we ordered the printer, and it's probably not a special material.

It's feels "gummy" and a lot softer than PLA, but not really rubbery either. And I tried printing something with it at 230C as if it was PLA and it's clearly not hot enough: it's able to flow out of the nozzle but it barely sticks to the bed.

Any idea what it could be?

4
5


My buddy has a cold plunge and this filter started cracking. After looking at it you can tell it's definitely 3d printed (and well)

On the left you can see my first attempt. I just cut rectangular holes in CAD and it's pretty close but not pretty. Printed in PETG on a K1 Max

Is there a way to do this in the slicer instead? I played around with 0 walls and different infill types but that didn't work out

6


Bambu X1C

Hatchbox ABS black and clear black

Been having a lot of failures lately with printing. Anyone else using hatchbox and having issues? Filament quality gone downhill?

Just got a kilo of black and it’s jammed up my print head four times. Switched from that to some clear black and I got some massive warping, 1/4” lift that popped my print (about 6”x3.5”) off with a spaghetti failure about halfway through. I’ve never had warping this bad.

7


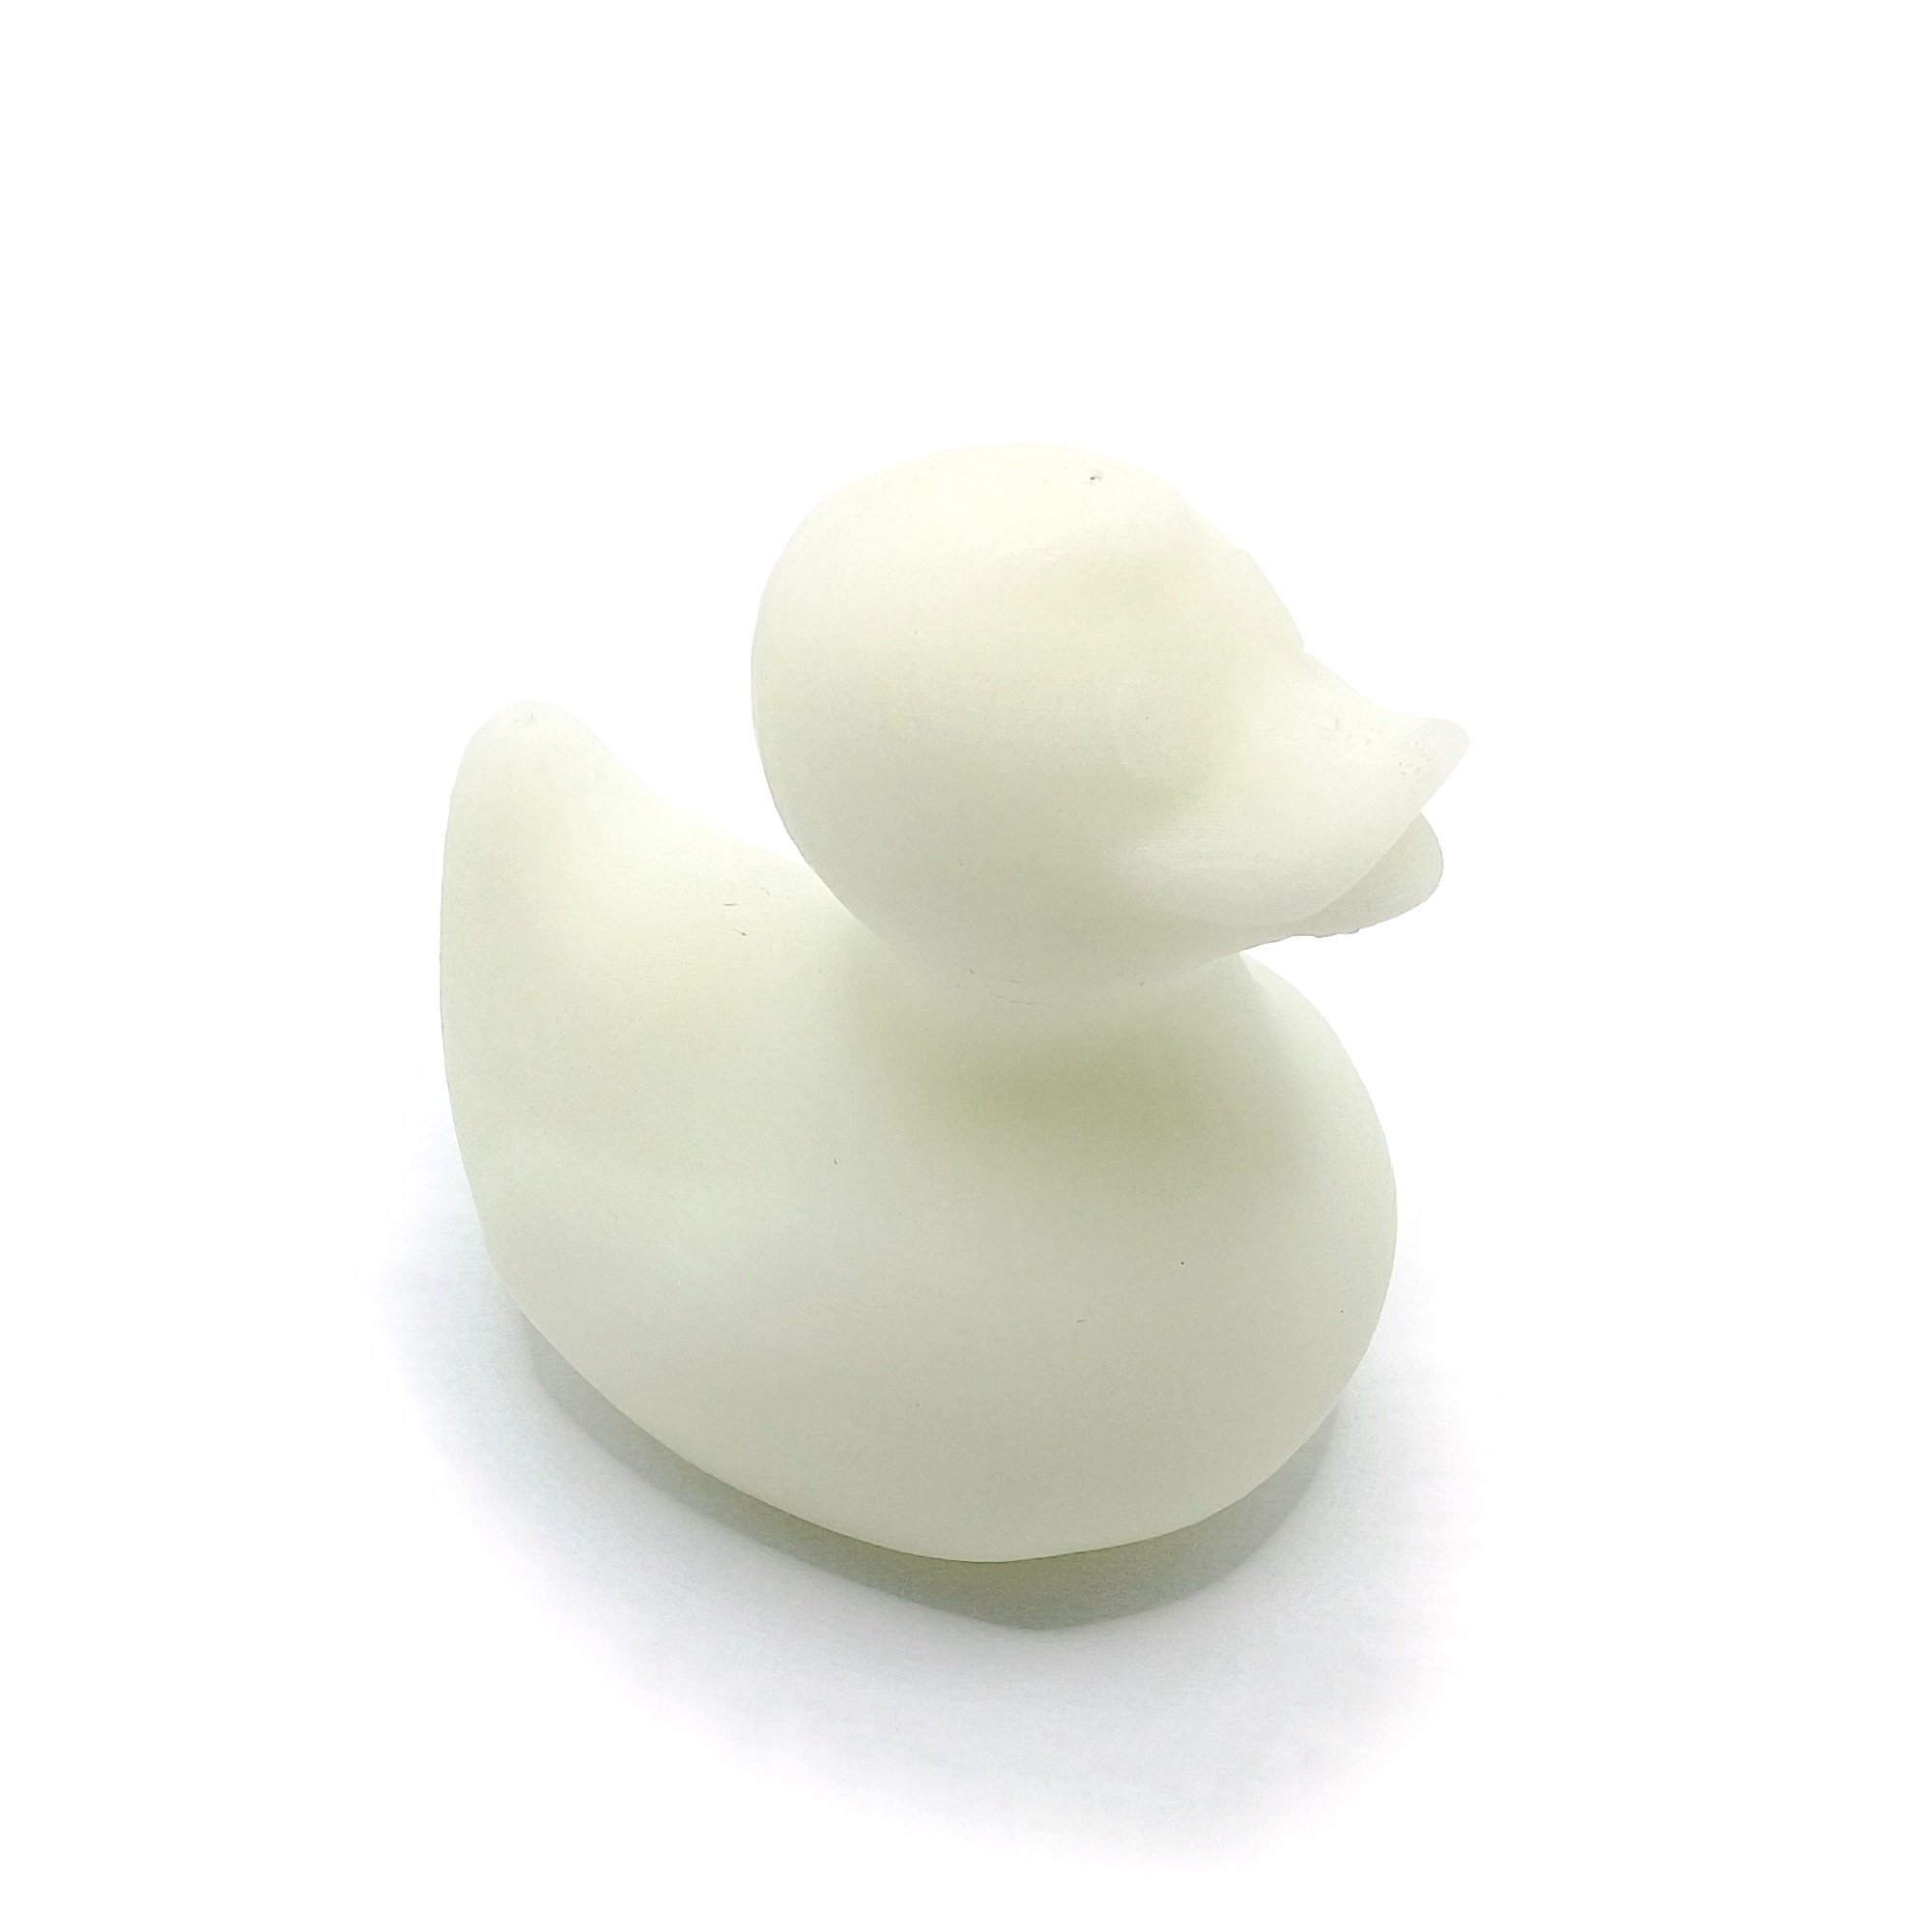
More noodling around with Overture glow PLA.

I tried to tweak the exposure a bit this time to make it look more like how you perceive it in reality.

8


I needed some film canisters for 120 film and turns out they're actually hard to find.

And when I did find models for them they had super thin caps so I decided to model one up with a better (IMO) method for securing the cap than threads.

Here's a link for those that want to check it out.

I also made a version for 116 film that's also in the link above.

Also if anyone has a roll of 220 film they could snag the dims of for me that would be great.

9


...after an extended period of PETG, and I have to say I think my favorite part is after the print ends and the bed starts to cool off and the snap/crackle/pop of the piece coming off on it's own. Such a pleasant ASMR experience.

Highly recommend..

10


My extruder is vibrating instead of feeding. If anyone has any advice I would appreciate it because I am dumb.

11


Also chance to win lifetime free perks

12
 
 
13
58
submitted 5 days ago* (last edited 5 days ago) by [email protected] to c/[email protected]


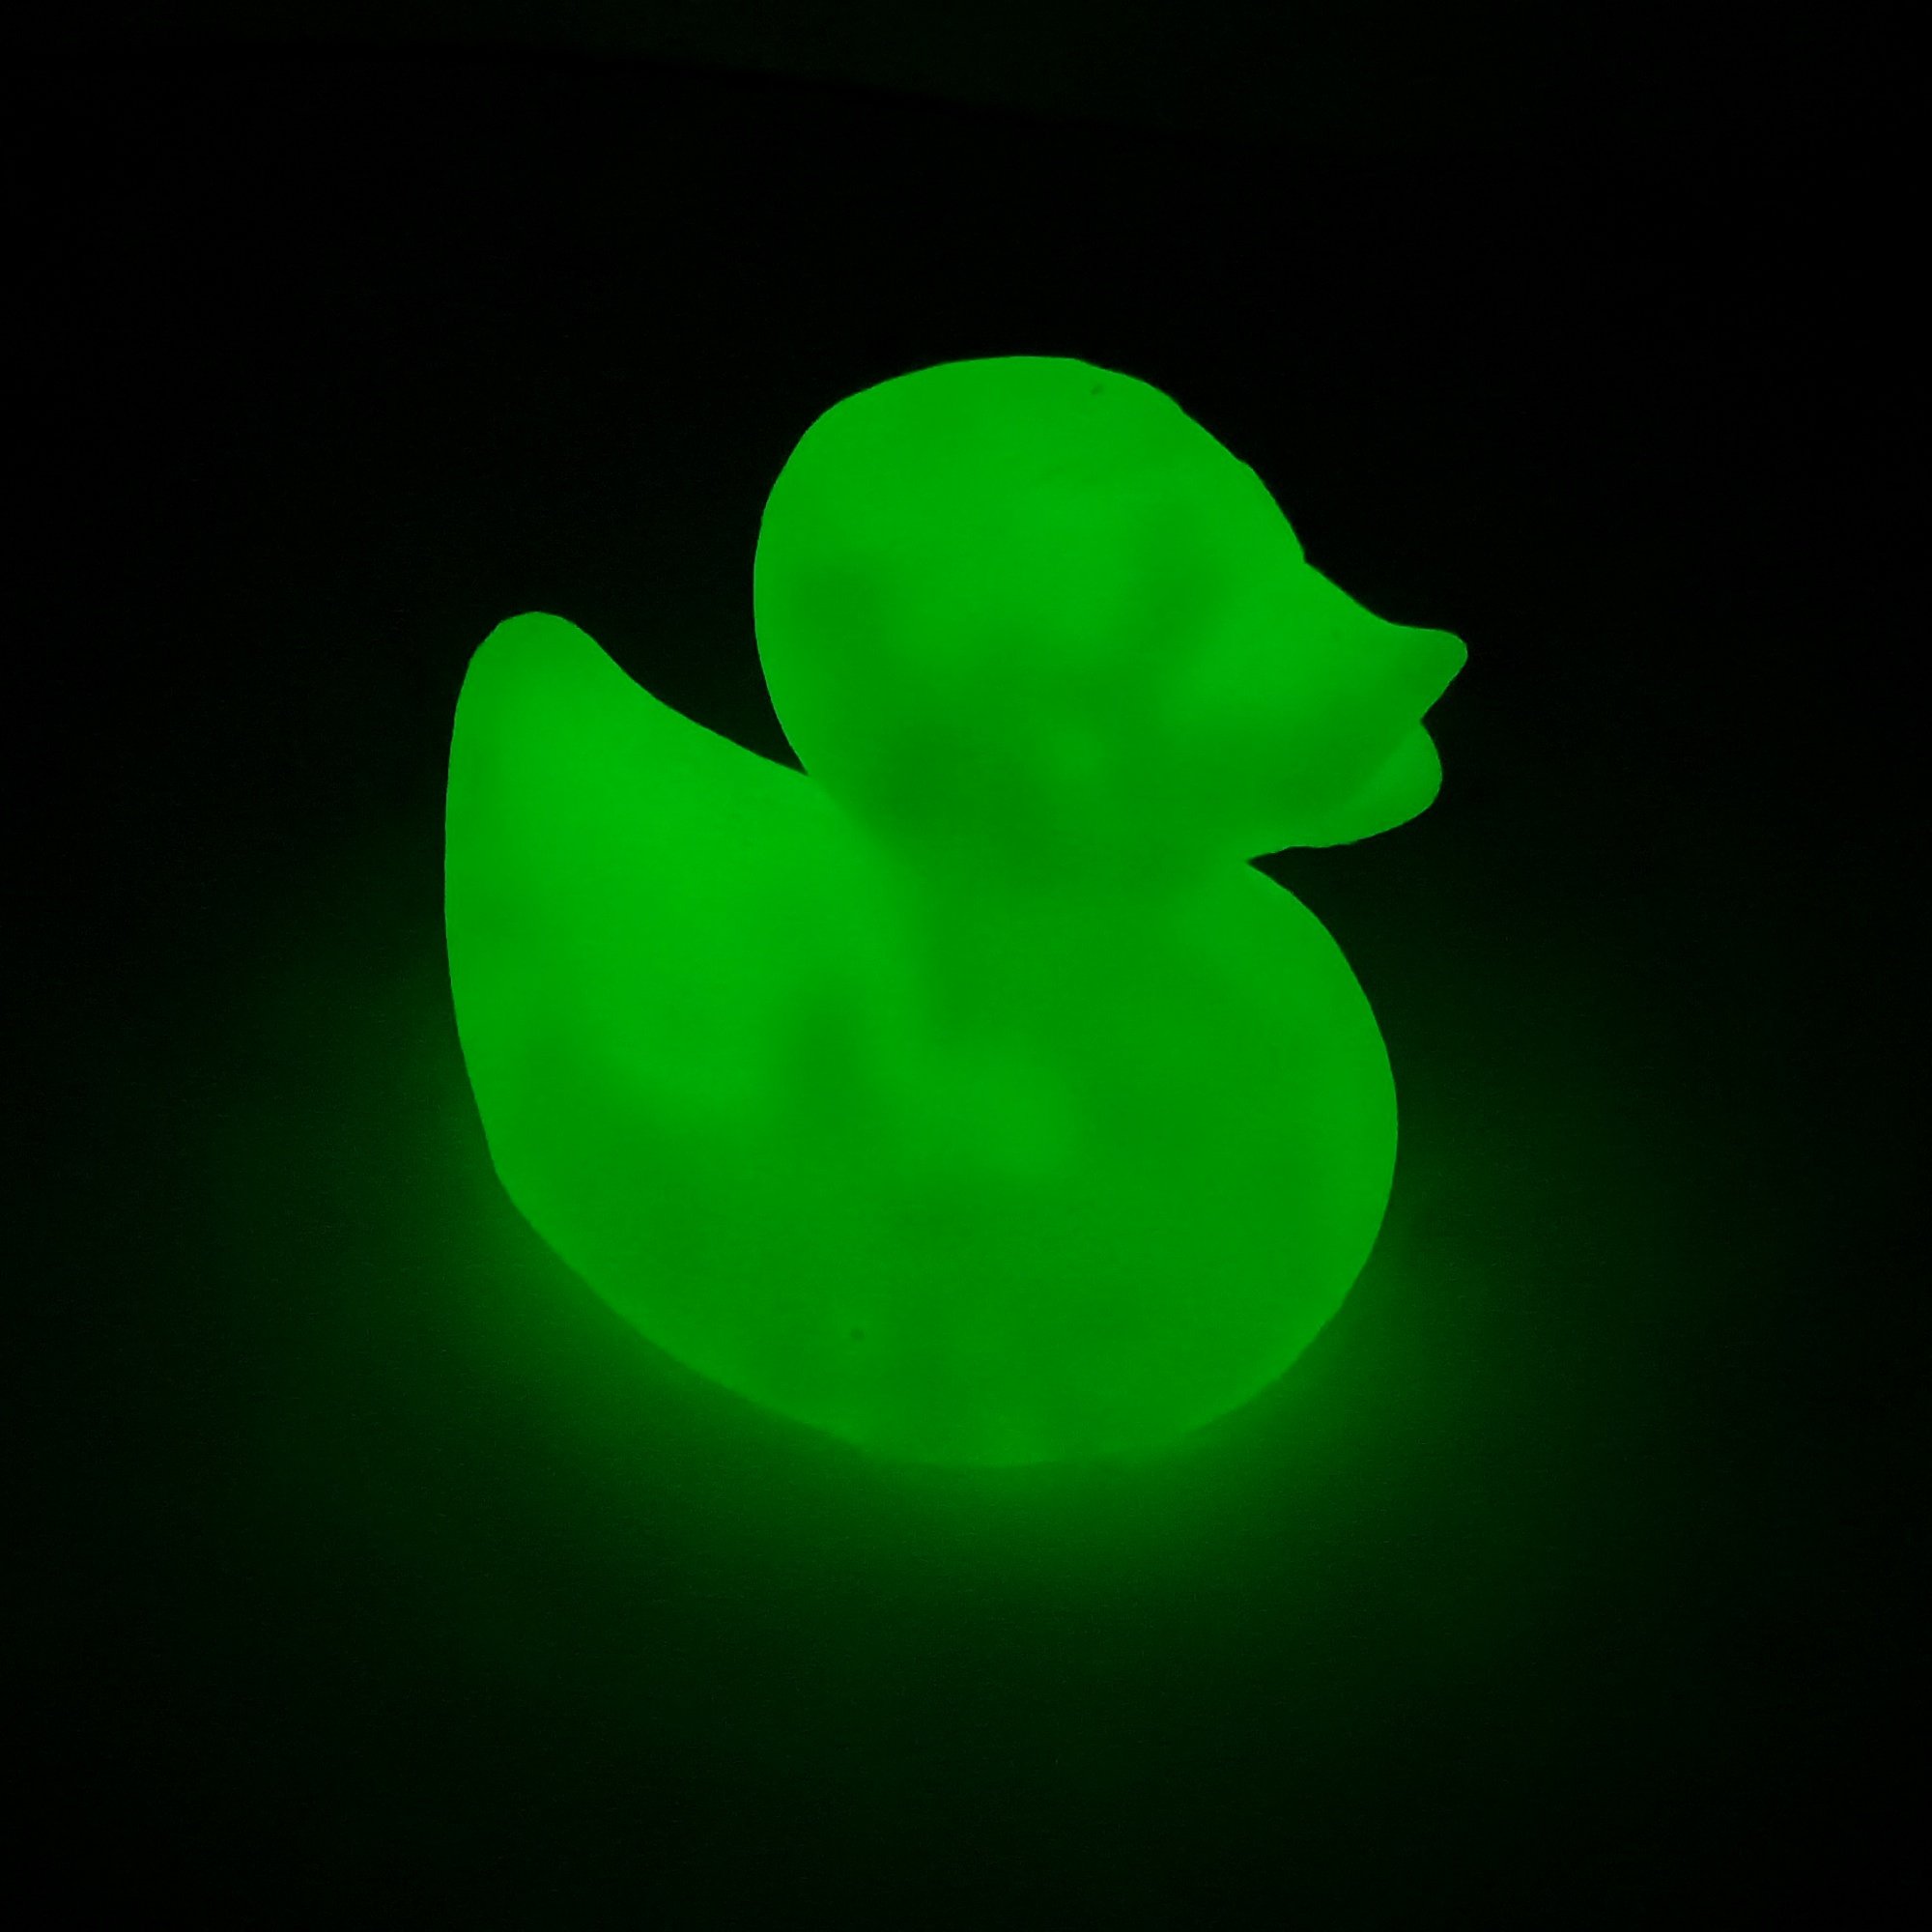
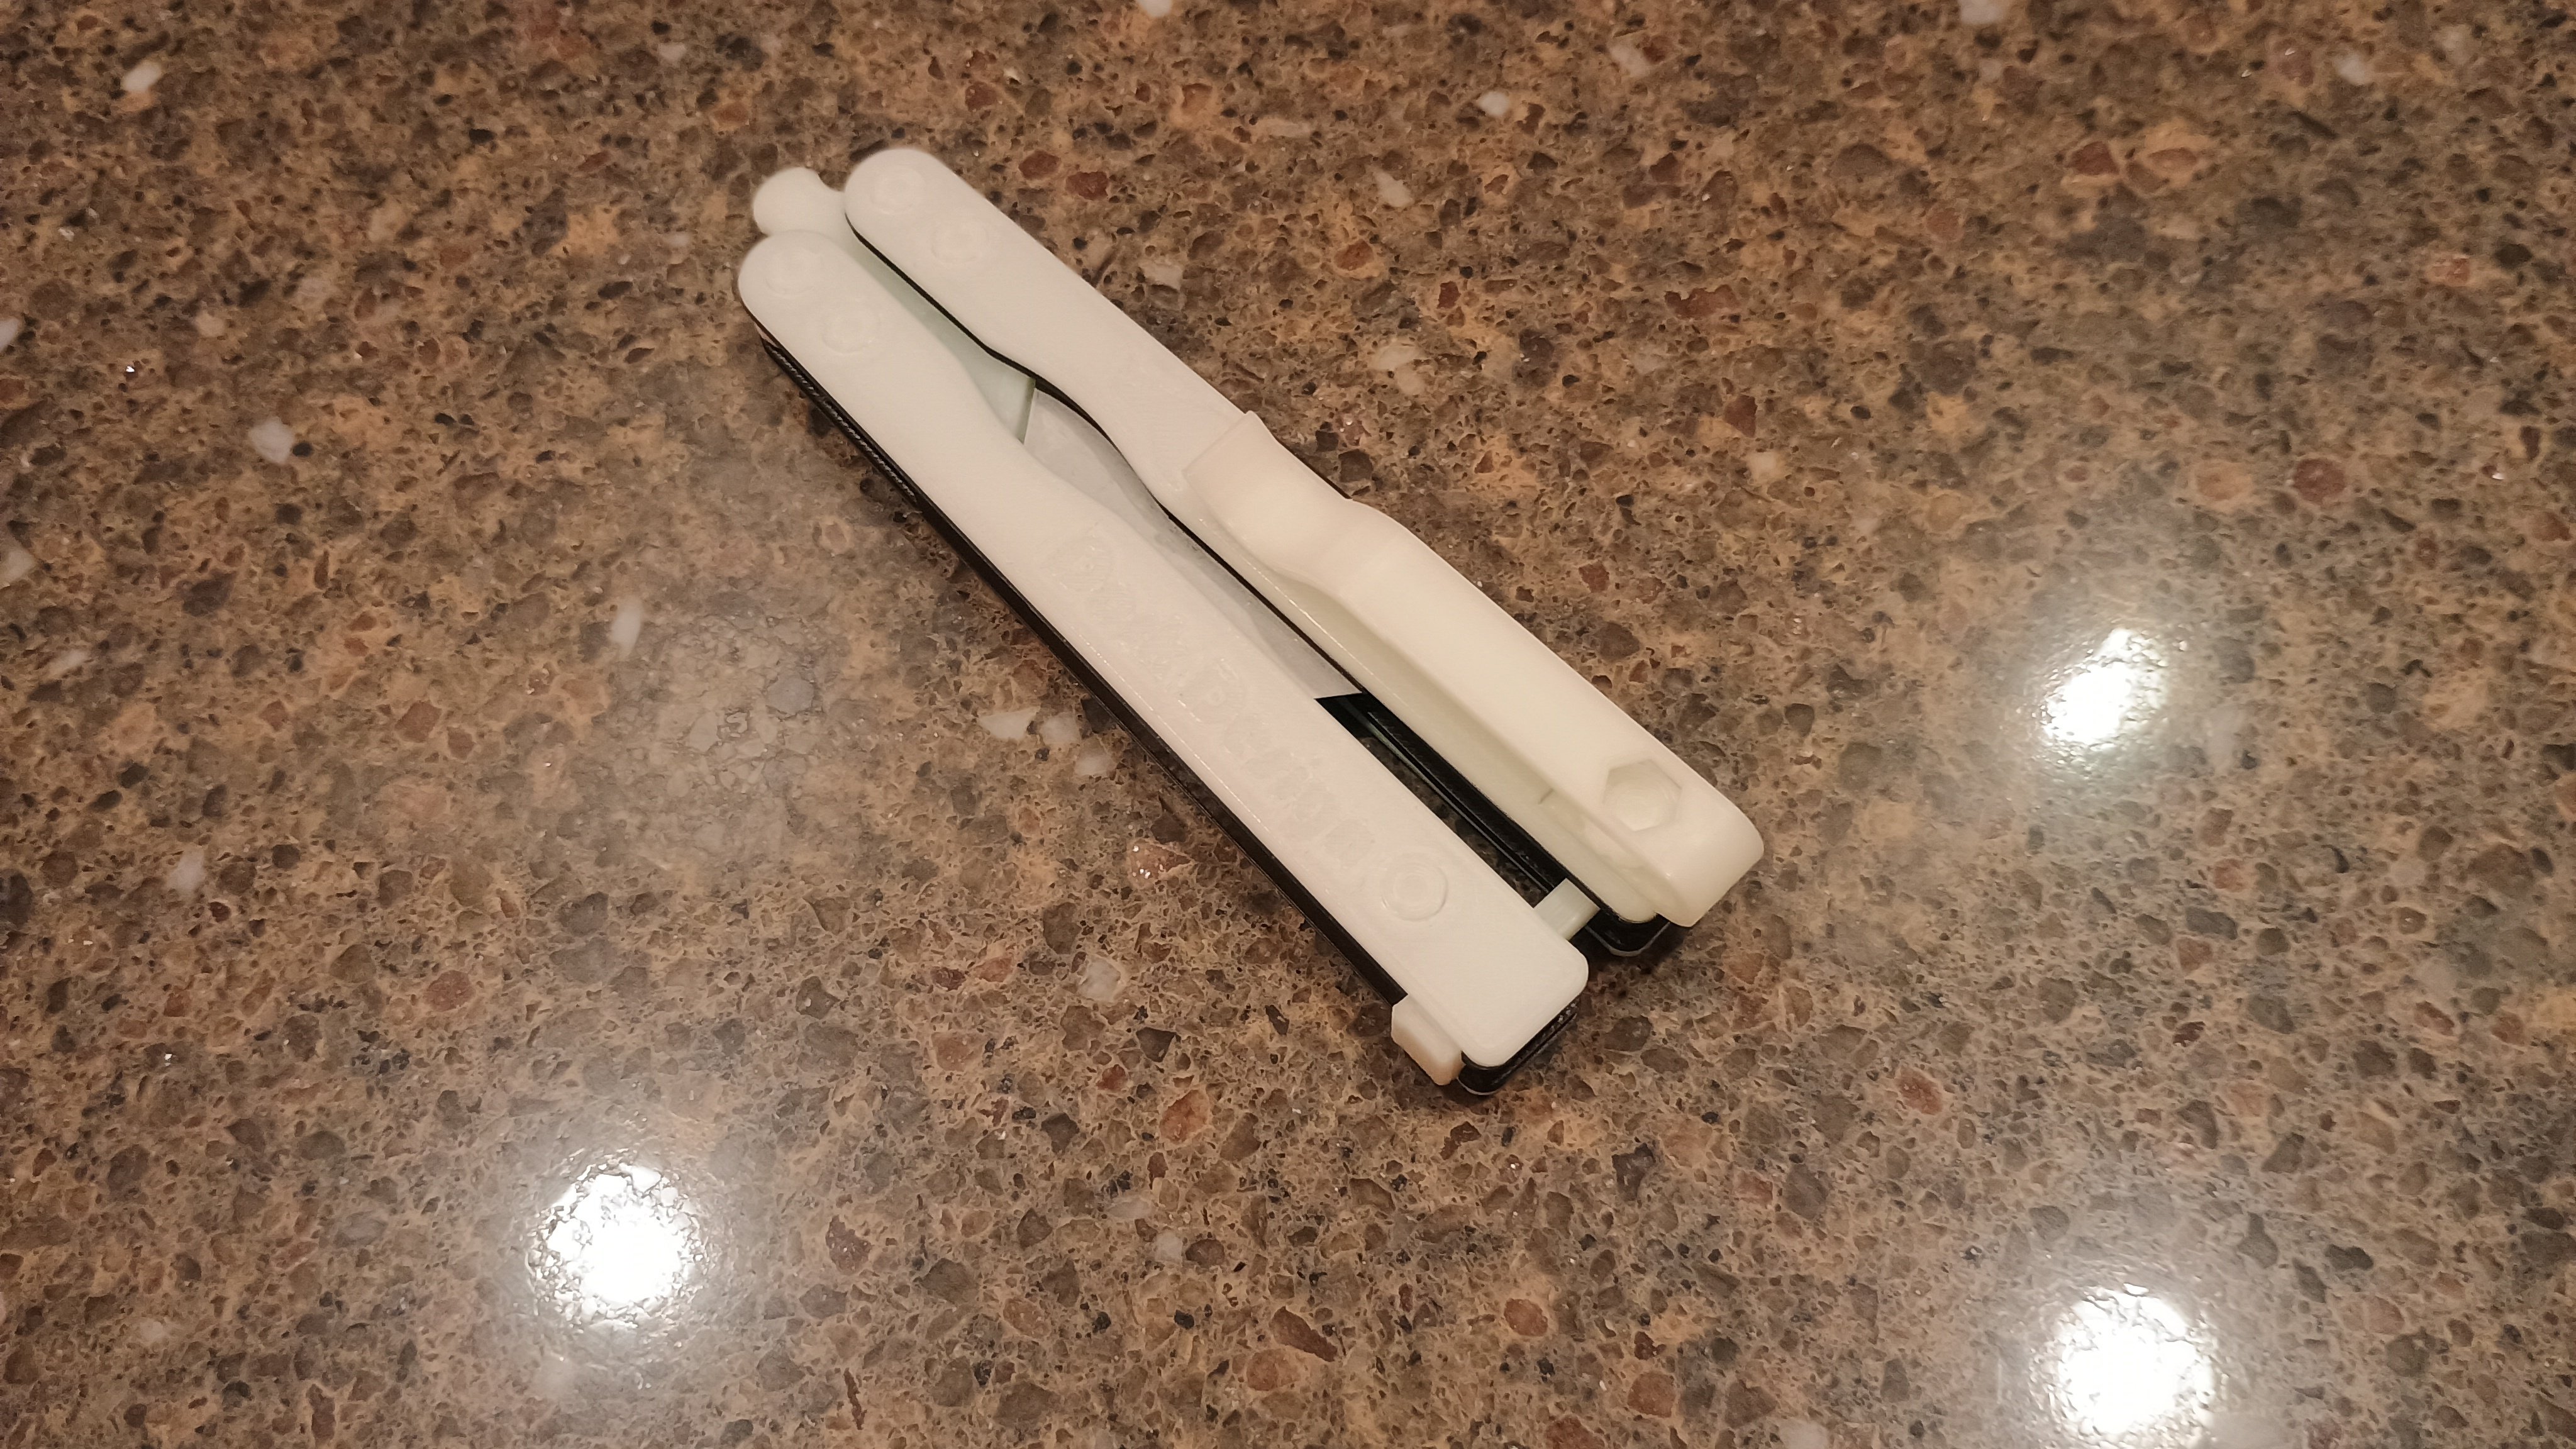
I'm finally getting around to messing with this stuff. Now I can balisong in the dark.

Step 2 is determining how badly all the particles of gumf in this filament negatively impact the mechanical strength.

Edit: I probably should have said this in the first place, but this is Overture green glow PLA.

The model is my Rockhopper balisong utility knife. Go check it out -- it's fully printable, even the hardware.

14


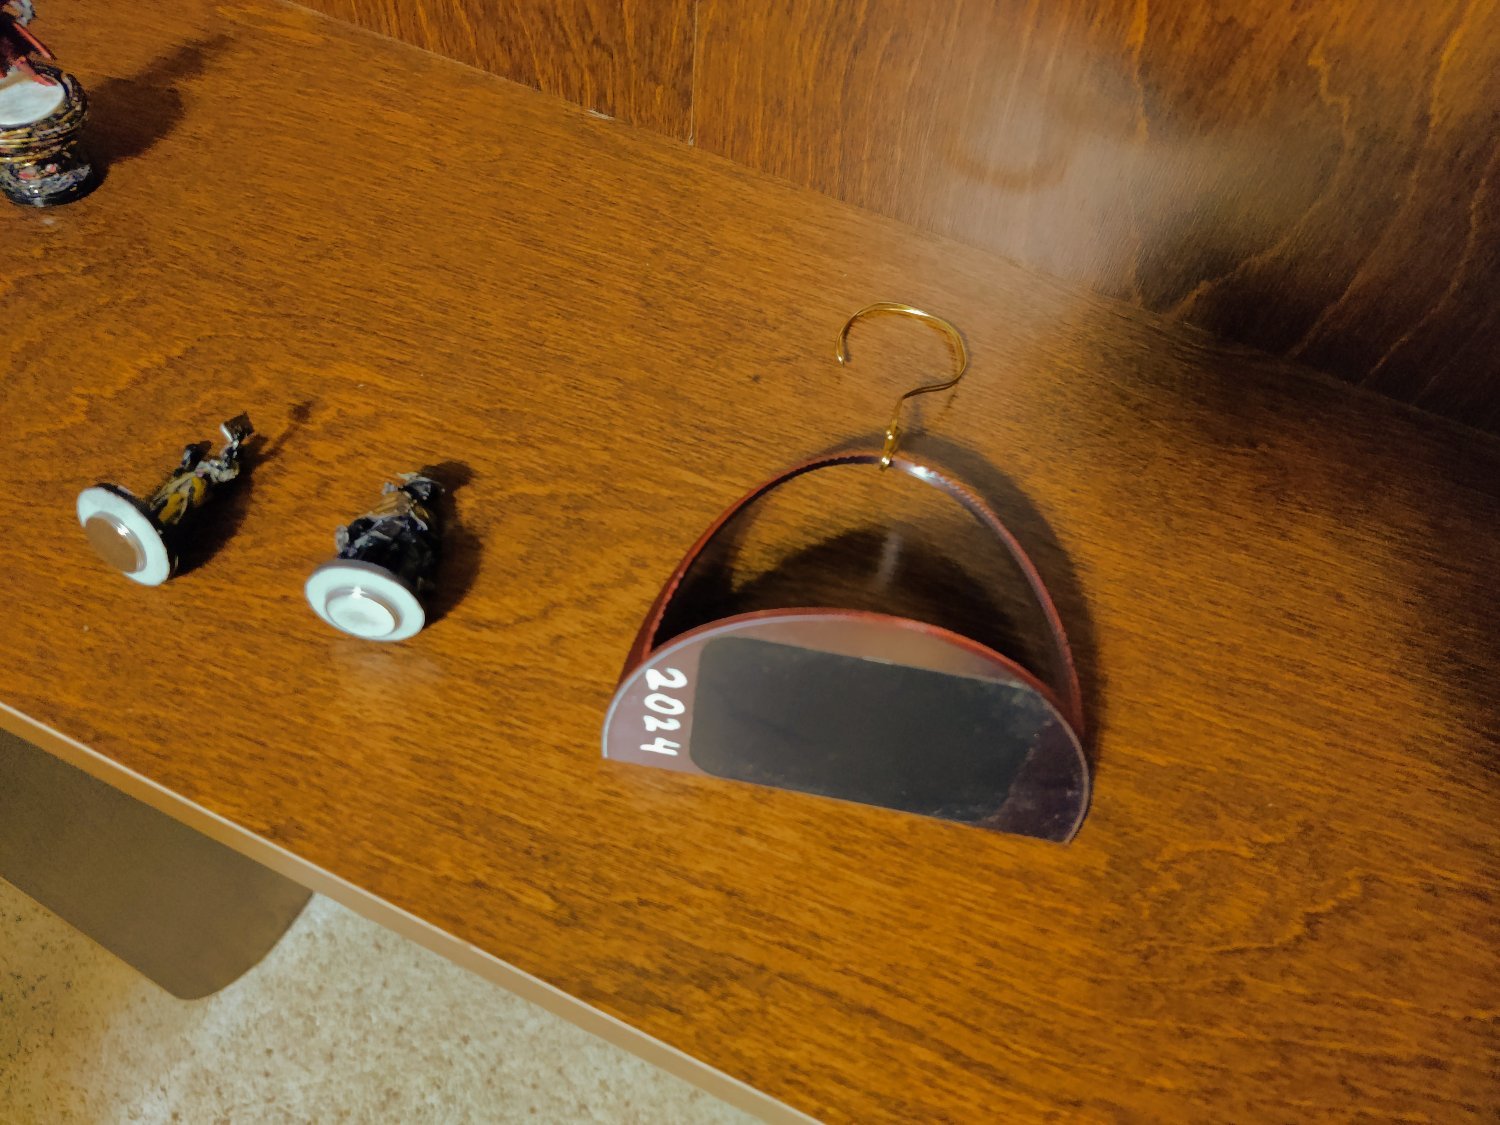
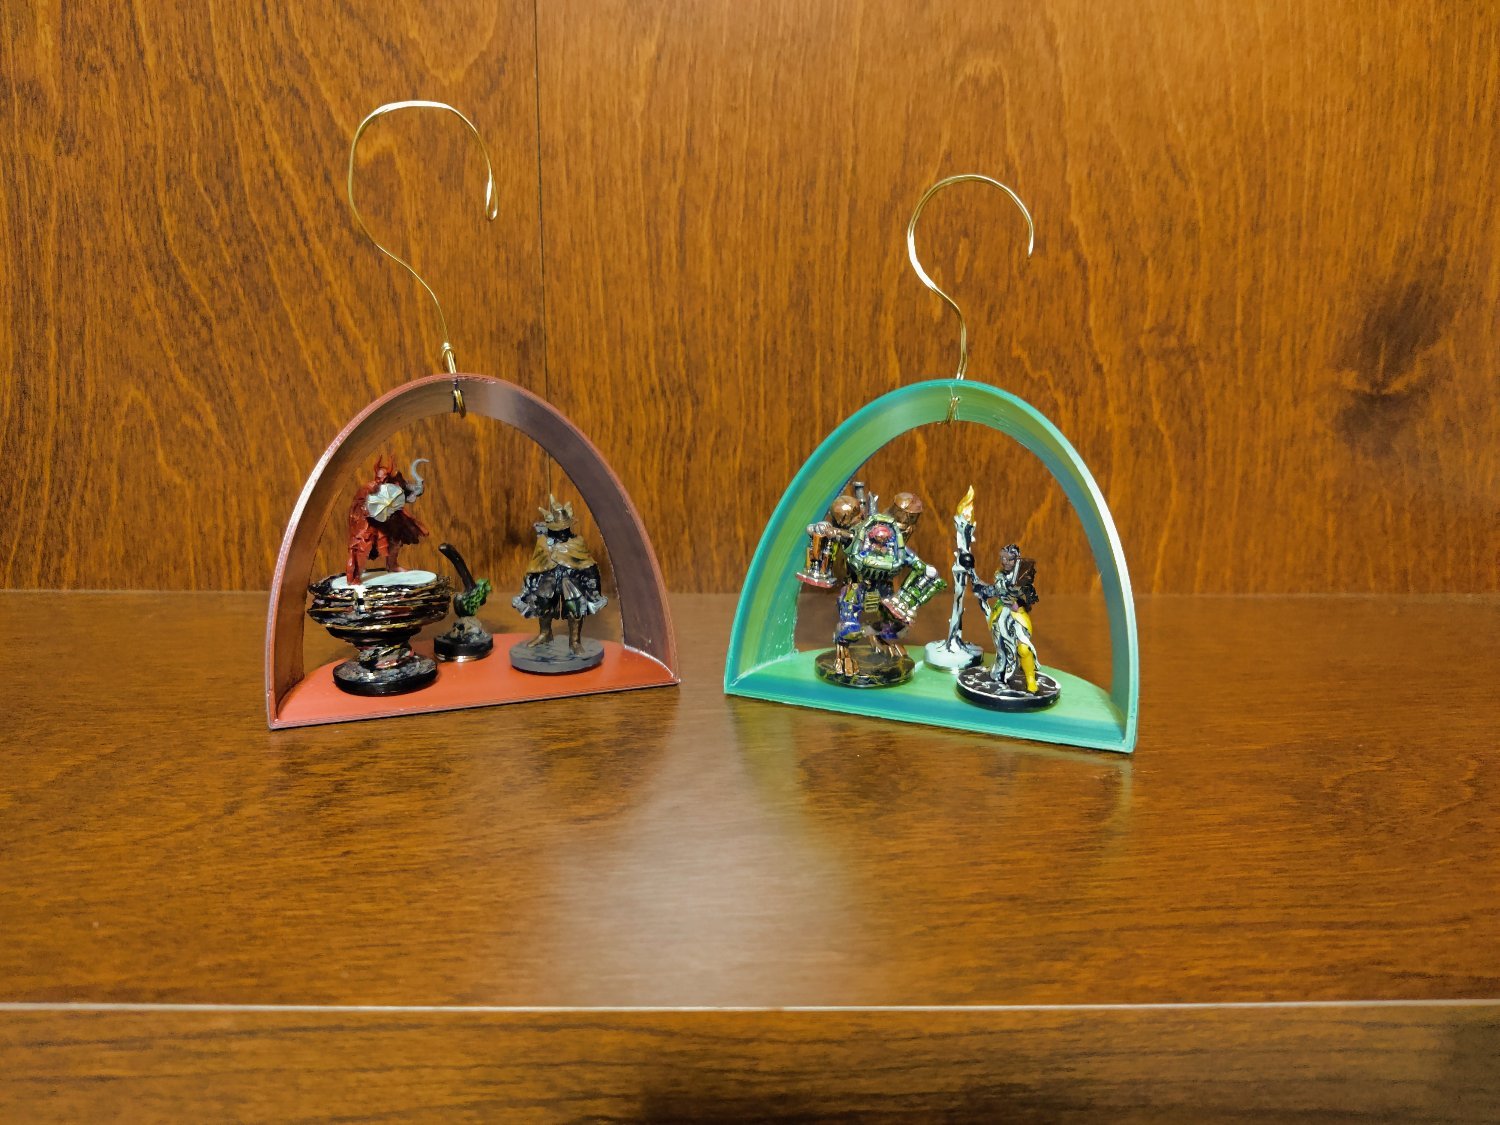
We wanted to turn these painted minis into tree ornaments, and this is what we came up with. I used magnets!

I'm also really happy about figuring out the print orientation: it prints with the flat front down, so the arch comes out great without supports. Here's a printables model page for it.

15
134
submitted 1 week ago* (last edited 1 week ago) by [email protected] to c/[email protected]


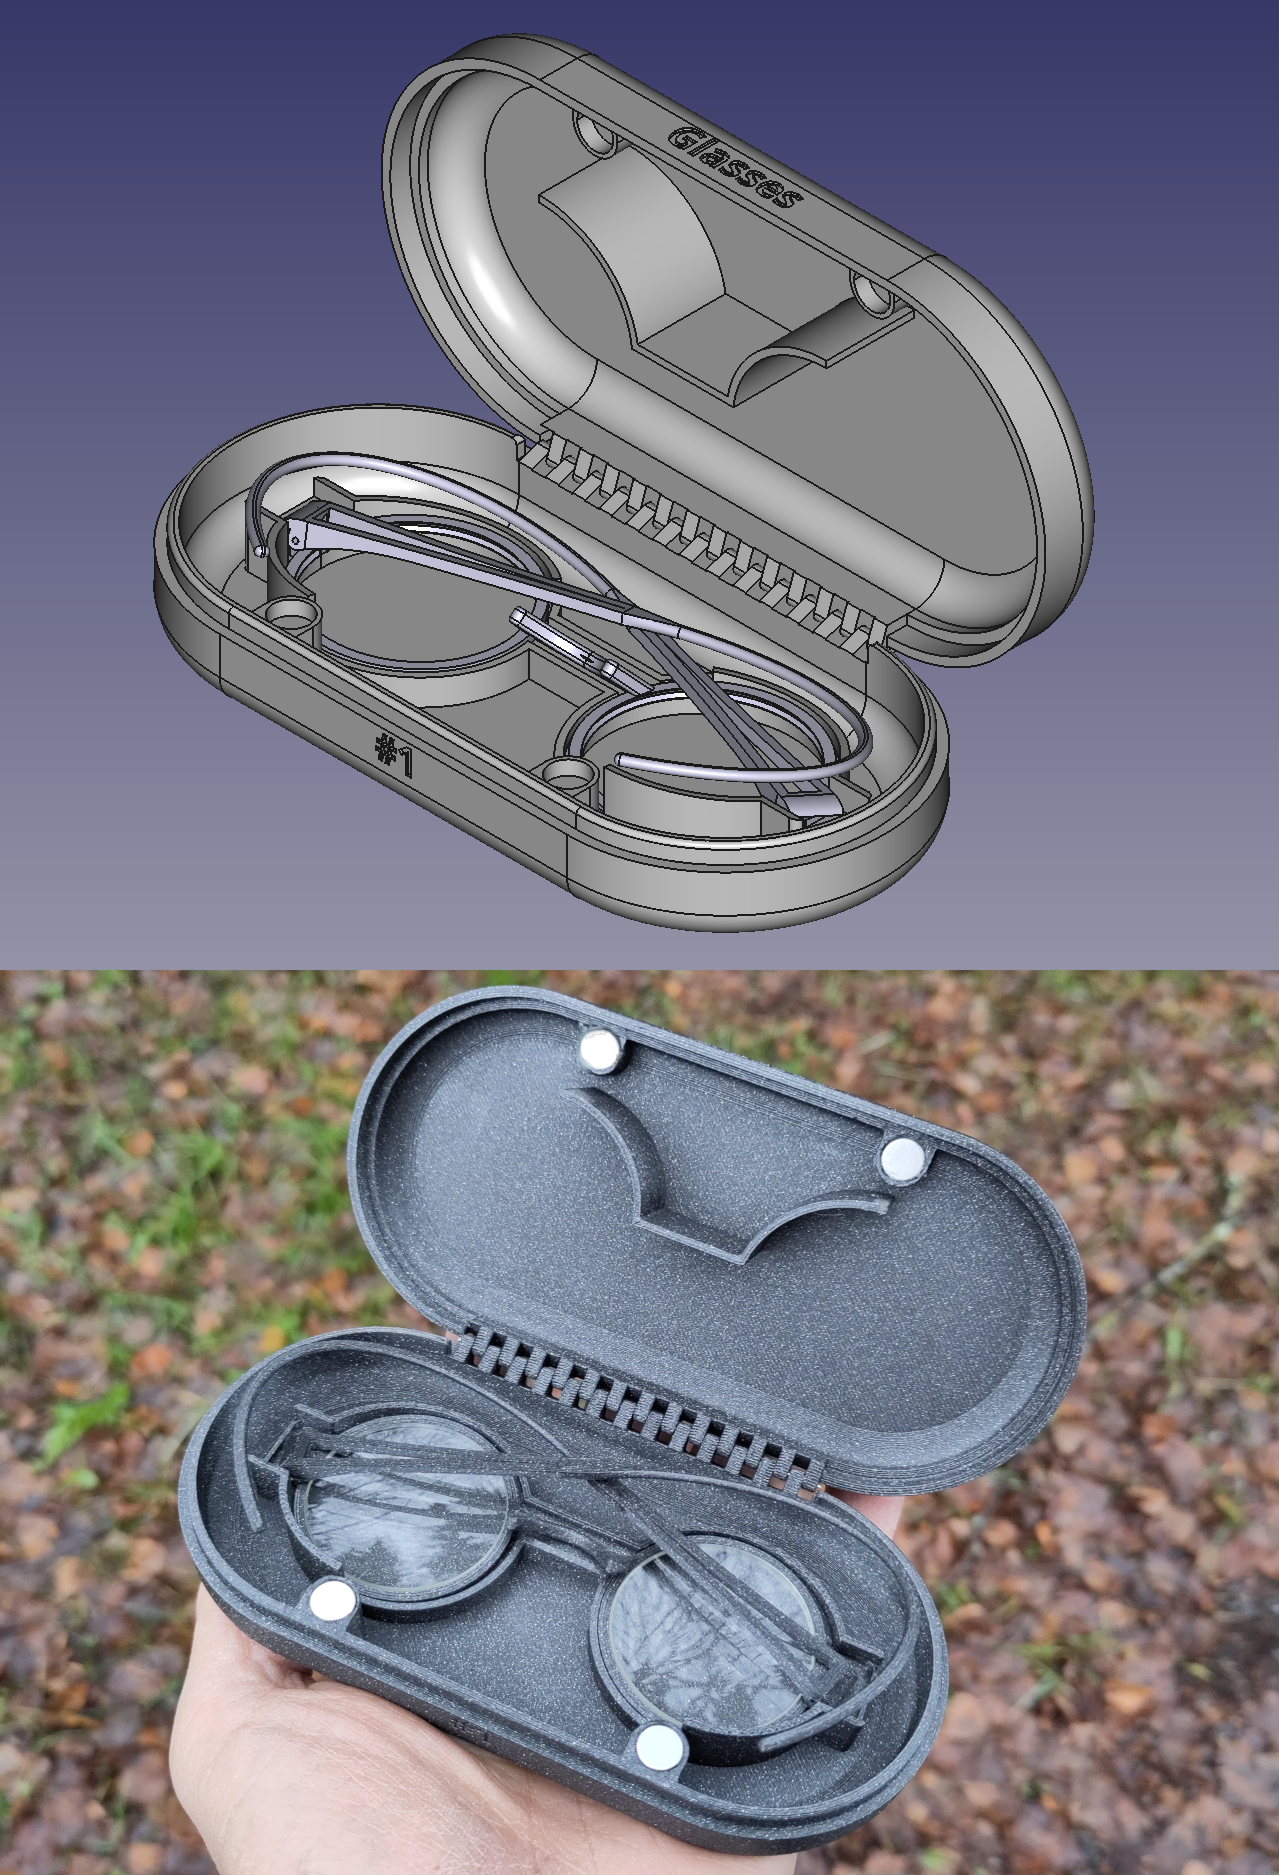
I made this custom case for my 3D printed spectacles:

Custom case

It holds the glasses by the edge of the frames, so the lenses are suspended above the bottom of the case without touching anything and no padding material is necessary to prevent scratching.

And being specially sized for those glasses, the case is no larger than it needs to be.

Did I mention that I love 3D printing? 🙂

16


Hi all

I've made a detachable toolhead mod for an Ender 5 that uses an MGN12 linear rail on the X axis. It also assumes using an Orbiter 1.5 extruder. The idea is to be able to switch between 3D printing, lasercutting and very light milling easily. The main purpose is to be able to use the Ender 5 for PCB making and that is what the small drill unit is good enough for.

Let me know what you think and feel free to remix it for your own setup!

17
25
submitted 1 week ago* (last edited 1 week ago) by [email protected] to c/[email protected]


Next week is the FormNext 2024 trade show in FFM. Are you looking forward to visiting it or watching news coverage?

Looking into it I notice that this year there is a noticeable fluctuation. To name one example: Duet3D isn't there this year.

18


Howdy all, so I've been looking to buy a 3D printer for a while now and now that I've got some money for it, ive been looking at the Ender 3 V3 SE as it seems to be a good sub $300 printer from the reviews.

However, I've heard that there were some bed leveling issues with it after a firmware update and I've been trying to find information if this has beem fixed or not yet.

So to anyone that has an Ender 3 V3 SE, has this been resolved? Is it ongoing? If it is, I'll likely buy something else as I'm just getting into 3D printing and I'd rather not tinker with it a ton.

19


This guy is doing amazing work, just wanted to share here. His videos are also quite humorous too.

20


So, I'm trying to print some older models from thingiverse and I have discovered that basically all the files I want to print have glaring flaws in them.

Internal free floating structures, connector pieces and holes that are the exact same size... So on and so forth...

Do I need to learn a software like CAD or Blender to fix these? I seem to be able to do some basic stuff in Orca Slicer but it honestly seems like as much of a pain to modify the parts there as it would be to use a real software.

Is there one that's easier? I think I messed around with SketchUp once upon a time.

I am worried this feels like opening a can of worms just so that I can make a thing that already exists in a dozen forms better.

21


This was an ornament I printed roughly 6 years ago. Being a Christmas ornament it spent most of those 6 years stored in my roof space.

Being in Australia this would have been subject to average temperatures of 30 to 35 degrees c but also peaks across summer approaching 70 degrees c. Also in high humidity.

The PLA crumbles into tiny pieces at the softest touch.

I thought it was interesting that PLA would start to break down in these conditions.

22


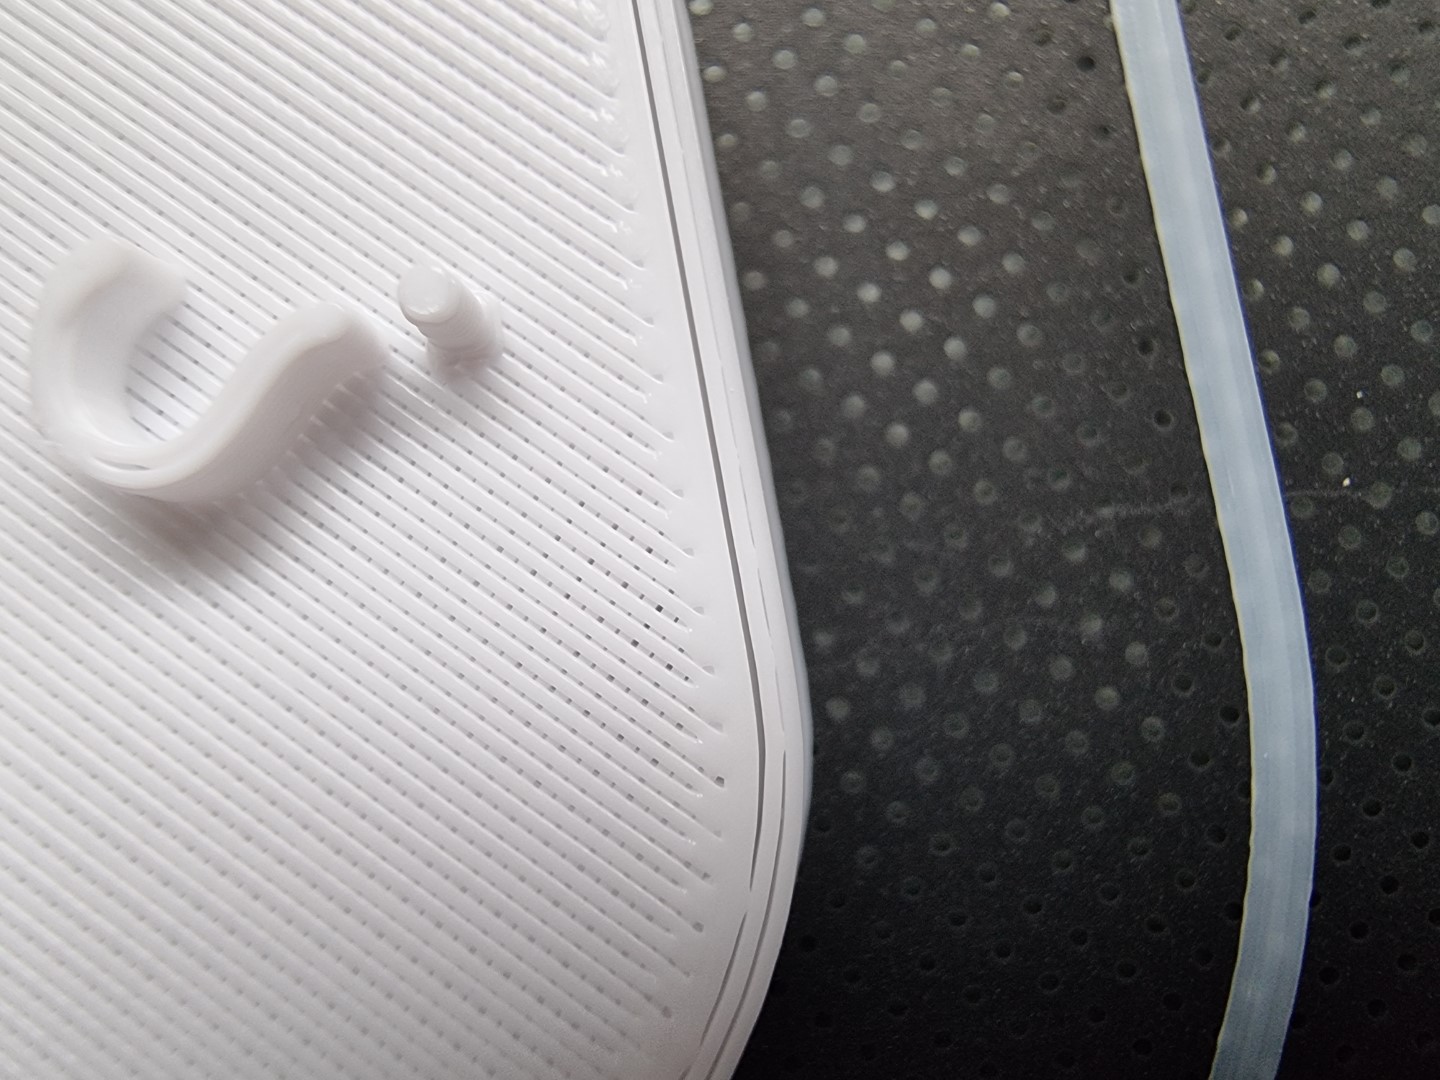
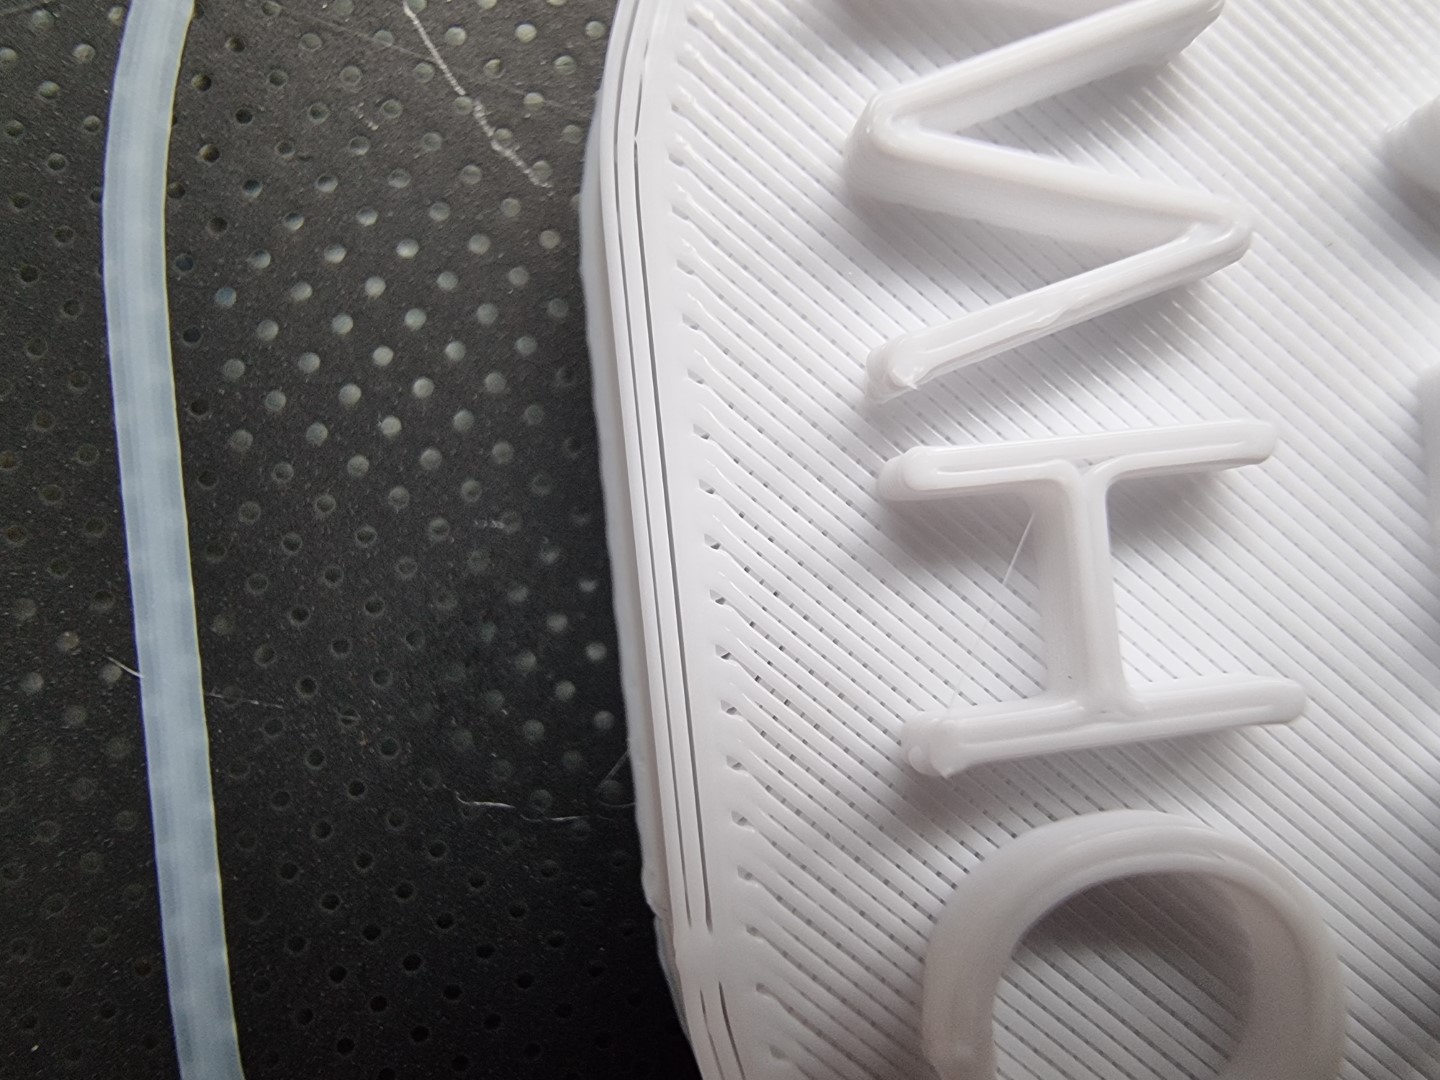
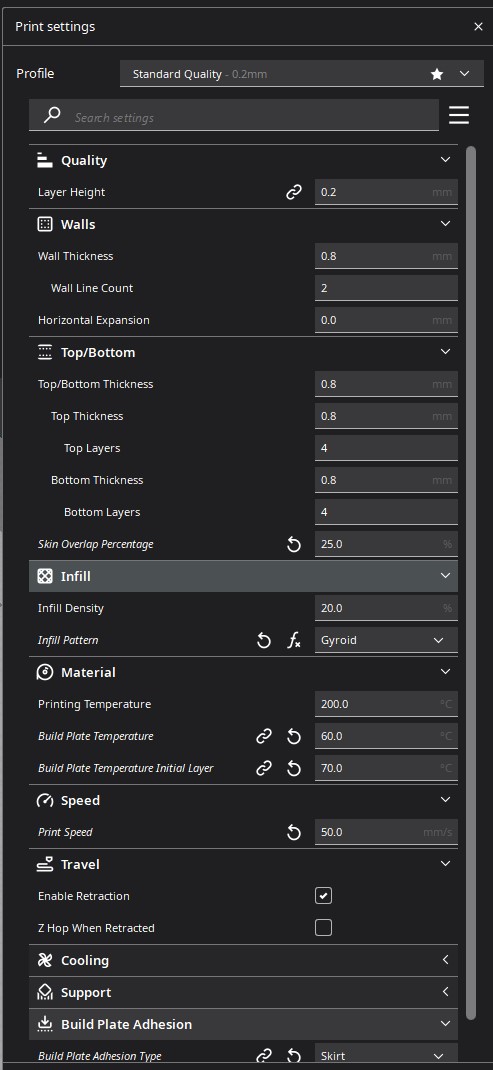
Hey y'all, I've been having issues with gaps forming between the outer layers of the print walls, and I'm not sure how to fix that. I thought it might be because of a clogged extruder, but the issue didn't get fixed when I cleaned it. I tried adjusting the E-steps, but smaller values caused blobs of filament to form on the outer walls likely because lower values overextruded the filament. Apart from the weird top layer and walls, the prints turn out perfectly fine, so it might be a slicer related issue. The printer is an Ender 3 pro with a bltouch sensor and upgraded marlin board + octoprint.

Here are some pictures of the issue, and a screenshot of the slicer settings:

Any help is greatly appreciated :3

23


I was lucky to spend 4 beautiful years with a Creality Ender 3 v2 that I modded to the brim and never failed to deliver quality prints. I never had to adjust, calibrate or tweak anything regarding print quality.

I upgraded today to a Sovol SV-08 because despite its qualities, the Ender 3 is too small and slow for my current needs.

However, the print quality is definitely not there (yet). Overhang quality is bad but I think I may be able to tweak it with filament temp and/or cooling. There's a bit of ringing but I can live with it. My main issues are the large holes in the hull.

Filament: Overture black PETG, 240°C, 24min print.

What should I try?

Thanks

Edit: most issues were solved by doing the following adjustments:

  • PETG temperature increased to 245
  • volumetric flow reduced from 17mm^3/s to 10mm^3/s
  • manually adjusting z-offset with the paper sheet method like on my old Ender3

There are still minor issues like overhang drooping and adhesion needs a bit more work but quality is now almost on par with my previous printer.

Thanks to everyone !

24


Hello, all!

I have been given an old 3d printer and I know very little about them. I did manage to get it leveled/calibrated/running and did a test print with little to no problem. I'm told it is a Prusa i3 1.75mm (or a "MK1"), however searching for information about it beyond the original manual has been very difficult. Specifically replacement parts to print/buy.

There is a fan on the back of the nozzle that has a shroud over it that has just absolutely snapped at some point. It's zip tied on at the moment and there's supposed to be a solid piece on the side but it has disappeared on me. I'd like to print another.

Does anyone know if this printer goes by other names or has an official model name? Everything I search up shows a bunch of MK2, MK3, etc. rather than this old thing. I'm also curious if anyone knows where I might find a model for that shroud.

Thanks so much!

Pics:

Printer

Fan

25


Klipper aborted the print with:

Heater extruder not heating at expected rate Transition to shutdown state: Heater extruder not heating at expected rate See the 'verify_heater' section in docs/Config_Reference.md

Before any of this started,I goobered my original Rapido, so I replaced it with a Rapido 2. It's been in the printer since April, but I haven't done a ton of printing with it. After the replacement, all was well for a while. At some point, Klipper started randomly tripping thermal runaway protection. The spikes were instantaneous, so I suspected a wire break. It wouldn't be my first and they're usually easy to find. I moved the tool head around trying to find it with no success. I pulled apart both cable chains (yay Voron) to look for the wire break and didn't find one. I flipped the printer updside down and connections at the MCU - everything was fine. I went through the hot end and inadvertently pulled the thermistor out of the m3 slug. Here's a stock photo:

Suspecting a potential wire break at the thermistor, I manipulated the wiring to no real effect. Inside the M3 bung was some dried white stuff, which I think was probably Boron Nitride Paste. I bought some more from Slice Engineering and reinstalled the thermistor.

Two things changed after this. First, the terminator seems to be reading lower than it did before. I say this because I have a ton more stringing than I did previously. Second, the temperature is no longer spiking but it is doing this high frequency oscillation thing now.

The oscillation only happens once the printer is moving quickly. If it's still, or moving slowly, things are fine.

Thoughts? I'm suspecting the thermistor, but would like to troubleshoot if possible vs just throwing parts at the printer.

view more: next ›