Next week is the FormNext 2024 trade show in FFM. Are you looking forward to visiting it or watching news coverage?
Looking into it I notice that this year there is a noticeable fluctuation. To name one example: Duet3D isn't there this year.
Next week is the FormNext 2024 trade show in FFM. Are you looking forward to visiting it or watching news coverage?
Looking into it I notice that this year there is a noticeable fluctuation. To name one example: Duet3D isn't there this year.
China. That's where you can still get the Cobalt indicator and subsequently on Amazon, Aliexpress or ebay.
The upside is the fantastic color change, which is why some still prefer it and why it is probably still being made.
In Europe there is an alternative blue indicator that is cobalt-free, but it is more of a blue to brown/very dark red colour change, so not great either especially after a few drying cycles.
the granules are blue when dry and turn purple/red when they no longer absorbs humidity.
Don't buy those. Orange gel is the "new" blue.
The reason why the blue gel was phased out decade(s) ago is the CoCl2. Along all of the hazards are H350i and H360F (cancer and reproduction [aka. your plan to have kids might not turn out that great]).
While orange gel doesn't have as good of a color change it is significantly lower risk and shall be used.
Nice to see Piocreat improved this printer. Last year they used V-roller on a $2k+ printer.
Was very interested in it but decided against it as the price didn't matched the hardware.
3D40 at couple hundred bucks? Absolutely not. 3D40 for $50? No. 3D40 for free? Yeah. Just don't expect much out of it.
Go the other way and buy 3mm tubing and see what it does :)
Fair enough bowden has a lot of issues like filament compression (which can't be fixed with tubing) making it difficult to maintain a steady flow when conditions aren't steady (e.g. acceleration and so on).
With larger diameter tubes the issue of filament compressing gets worse. In a nutshell, a larger tube diameter for "rigid" materials somewhat is similar to the effect of a softer filament/material.
With direct drive, I would say it doesn't make a difference.
For bowden there is a benefit.
I also think that direct drive is superior to Bowden setups in nearly every situation. The current generation like the Orbiter v3 is a very light direct-drive extruder.
Don't buy anything you can't afford. Sounds like you already got that part right. :)
If so good 3D-printer are lower cost than ever. Sure you could pick up an used Ender 3 and the like for $50 and put in the elbow grease to learn like it was done in the old days. Alternative is spending $200 on an BambuLab A1 and skip most of the learning curve.
If you can handle frustration than a cheapo used printer could be a good option. Please ask before purchasing as not every $50 printer is a good deal/option and as a newbie you can't distinguish the good from the bad.
Use ASA. PETG will creep.
ASA will creep significantly less. If you have fibre-filled materials they also excel in this regard but are probably overkill here.
PETG will creep even at temperatures below 80°C and the higher the temperature is the faster the process is: https://en.wikipedia.org/wiki/Creep_(deformation)
I have a small collection of parts that all experienced creep (as a showcase). Structurally they where all fine in simulation and practice. Over time they all failed due this deformation.
For production parts look at other materials. Nylon might still be within the range of your 3D-printer.
For attaching: If you can't clamp then look at gluing it in place. If you need it detachable maybe drill a hole in the shaft and use a R-clip.
You can also tap and die the shaft on top. Make sure to use a left or right-handed thread depending on the rotation/load (thread is so that the rotation/force isn't unscrewing it).
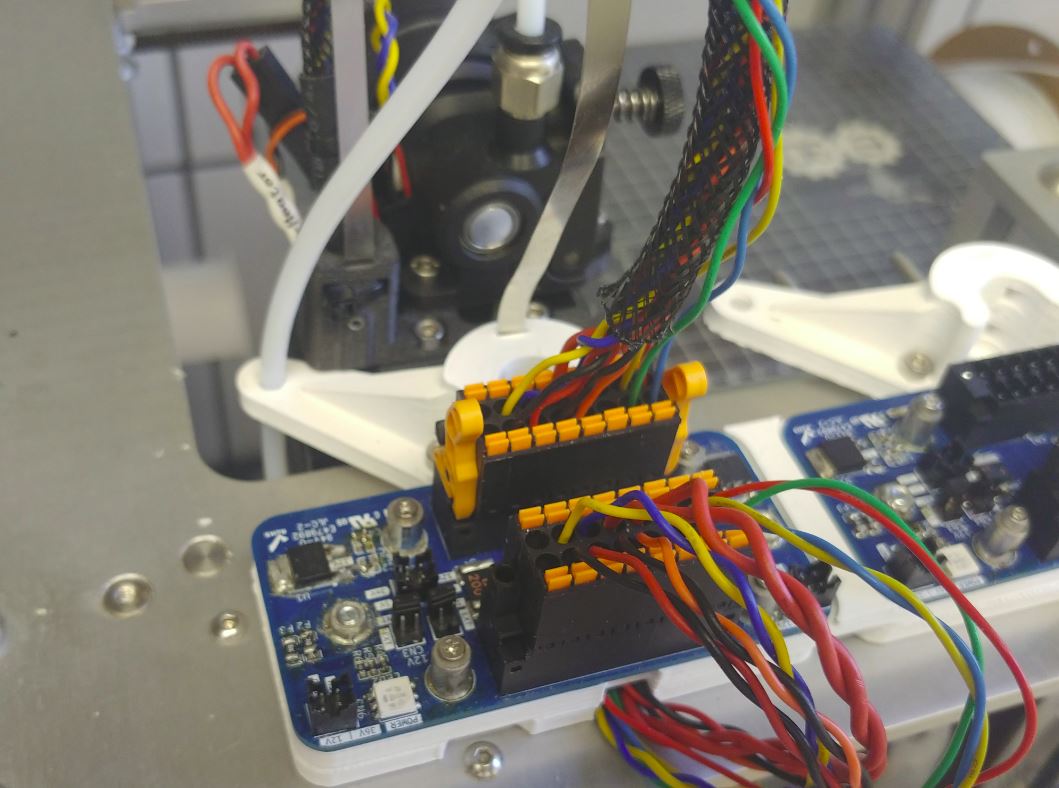
Quick upgrade for easy to plug and unplug end effectors/toolheads. Activity/status LED are also moved from the back of the printer to the top and some more voltage regulation to provide additional voltage rails.
While a nice connector adds significant cost it is also a big value add for certain 3D-printer. I think more manefacturer should consider tiny details like this when designing their product.
Strain relief isn't installed on this tool for reasons ...

Short overview of how good the nesting capabilities of various 3D slicer are.
The task is simple: placing as many of these shapes on a 200x300mm printed as possible. Manual (quick and dirty for reference): 6 pcs.
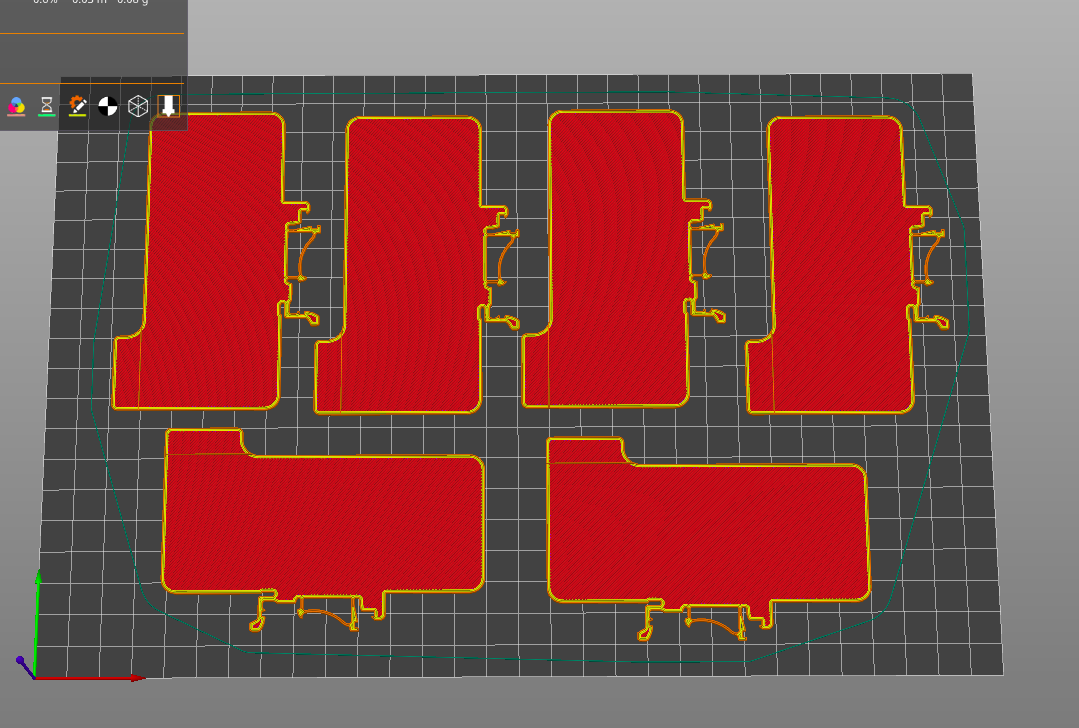
Ranking:
Ultimaker Cura:
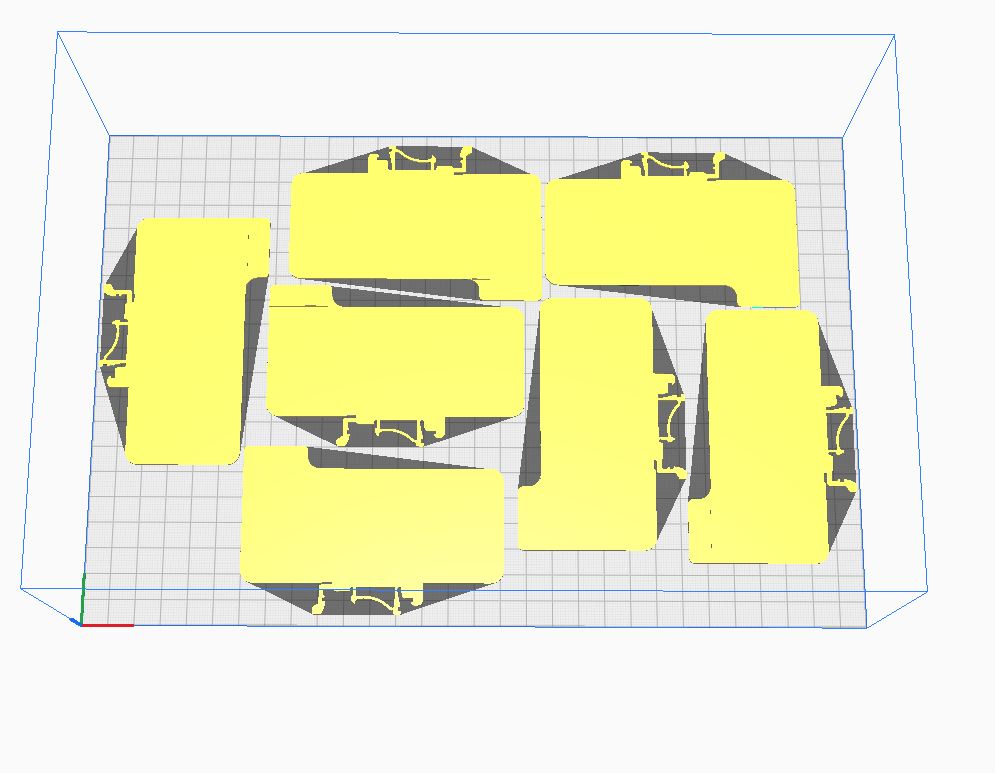
Prusa:
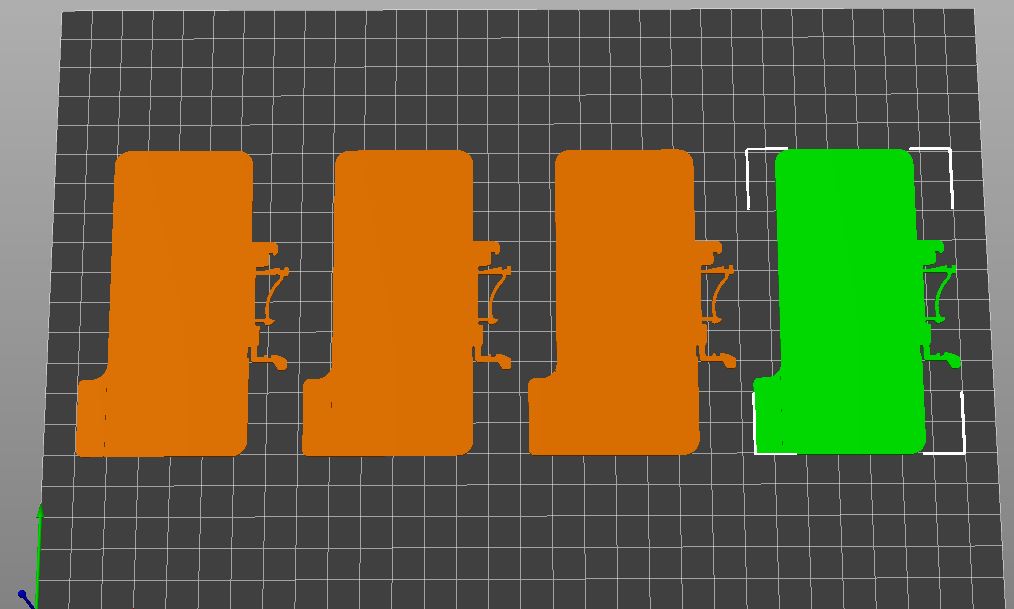
BCN3D Stratos (forked from an old version of Cura):

OrcaSlicer:

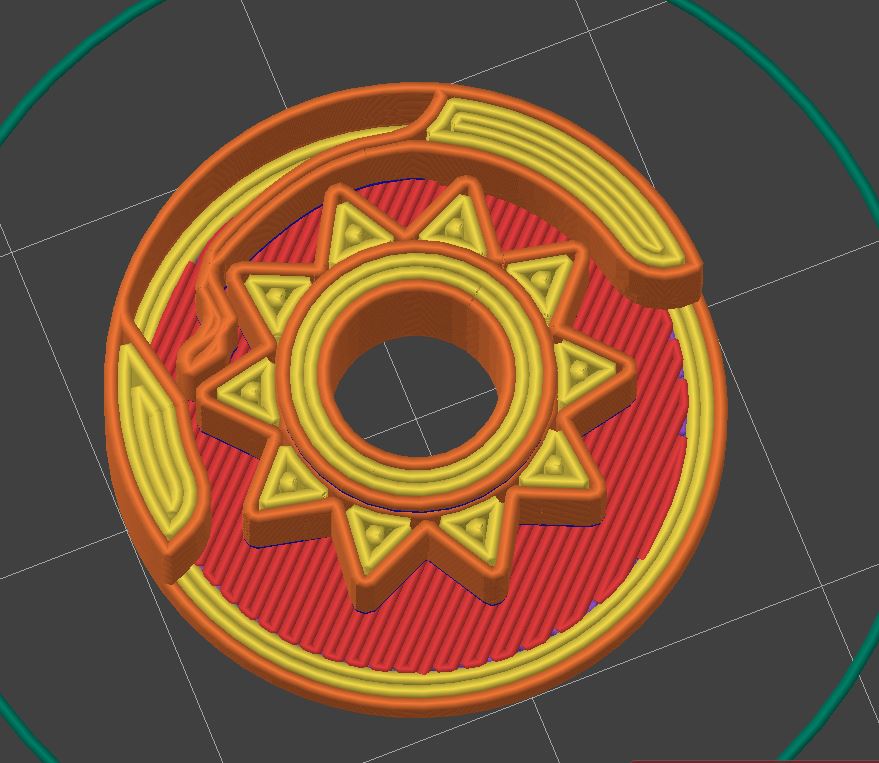
After half a dozen iterations, this was the first reasonably working, acceptable feeling, and good-sounding ratchet mechanism.
allows clockwise rotation blocks counterclockwise rotation
design features:
To get a full ratchet: mirror the assembly and add a mechanism/part that pushes one of the springs out. In neutral both leavers are engaged and the ratchet is completely locked.
Btw. Good luck copying it without going through half a dozen of iterations. Going from it barely works to this isn't easy. For my part: Version 5 was working and close to the final design. It took another 10 rounds to get it usable and from there some more to fine-tune it.
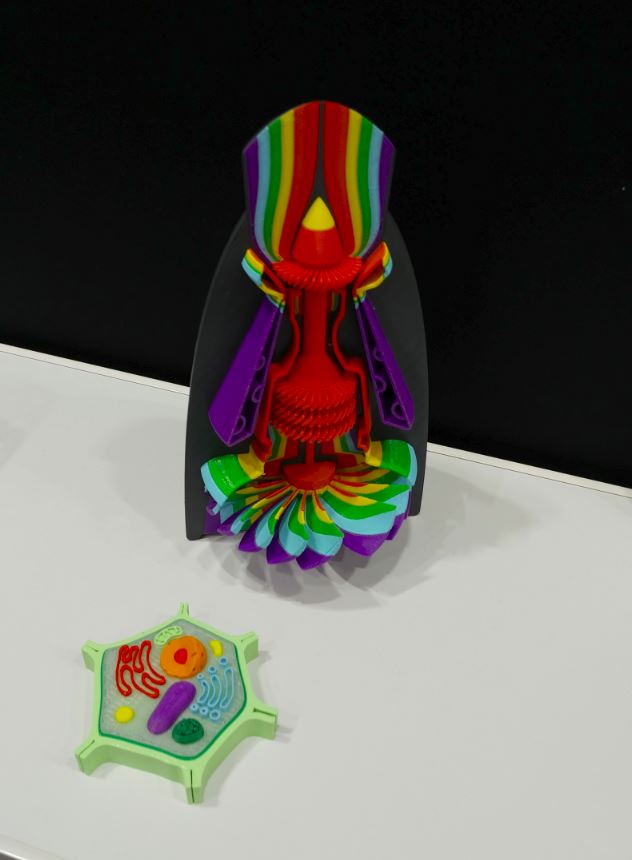
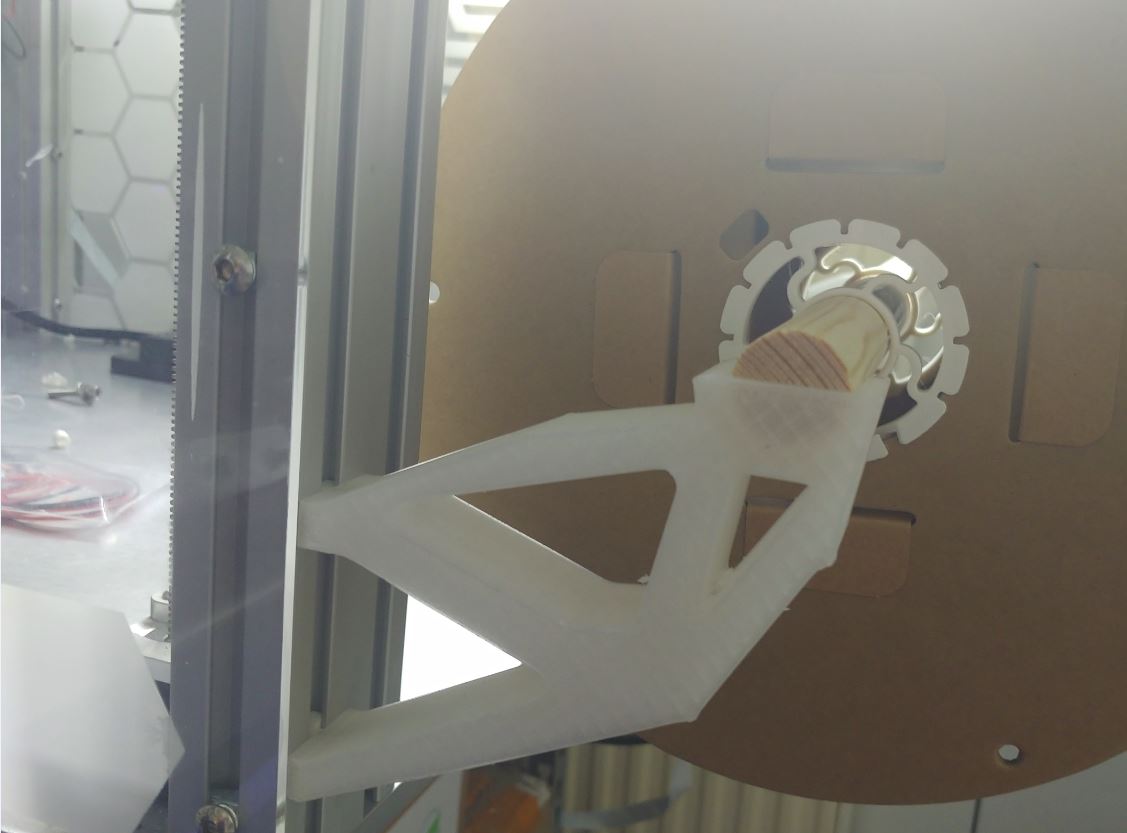
Quick and dirty 5 minutes craft: Draw a rough shape, define the contact surfaces & load, click run, and get the optimized shape. The last step is converting the output to a printable shape and running one more simulation to double-check it is strong enough.
This particular holder is a filament spool holder designed to be loaded with up to 5.5kg of filament (1x2.5kg, 3x1kg).
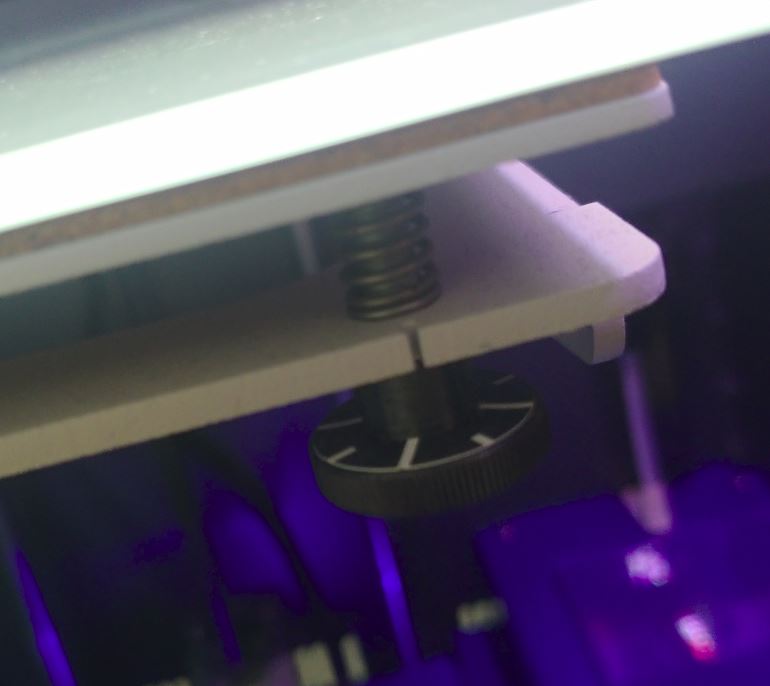
Building a 3D printer is easy. Getting the details right to build a great 3D printer is hard, as this is where most companies fail. Why?
For example, on this printer, the bed is a three-point mount (two wheels for adjustment at the front of the printbed) and the printer's bed levelling dialogue doesn't show the height difference that needs to be adjusted (which most 3D printers do). It does show how much it needs to be turned, and the bed levelling wheels have 1/8th turn indicators, making it easy to get it perfect.
In short, instead of an arbitrary number like 0.3mm that has no meaning to the user, they tell the user to turn this knob 1/4 of a turn. An instruction the user can follow.
** Why is this so outstanding? It doesn't cost much, but it improves the user experience. Are companies blind to these improvements because the engineers are experienced, or is there a lack of testing during development?**
By the way, years ago I did such a fix/modification myself on a Tronxy XY2 pro by adding indicators on the wheel for 0.2mm height difference so I could convert the number to rotation: https://www.printables.com/model/301670-replacement-bed-leveling-wheel
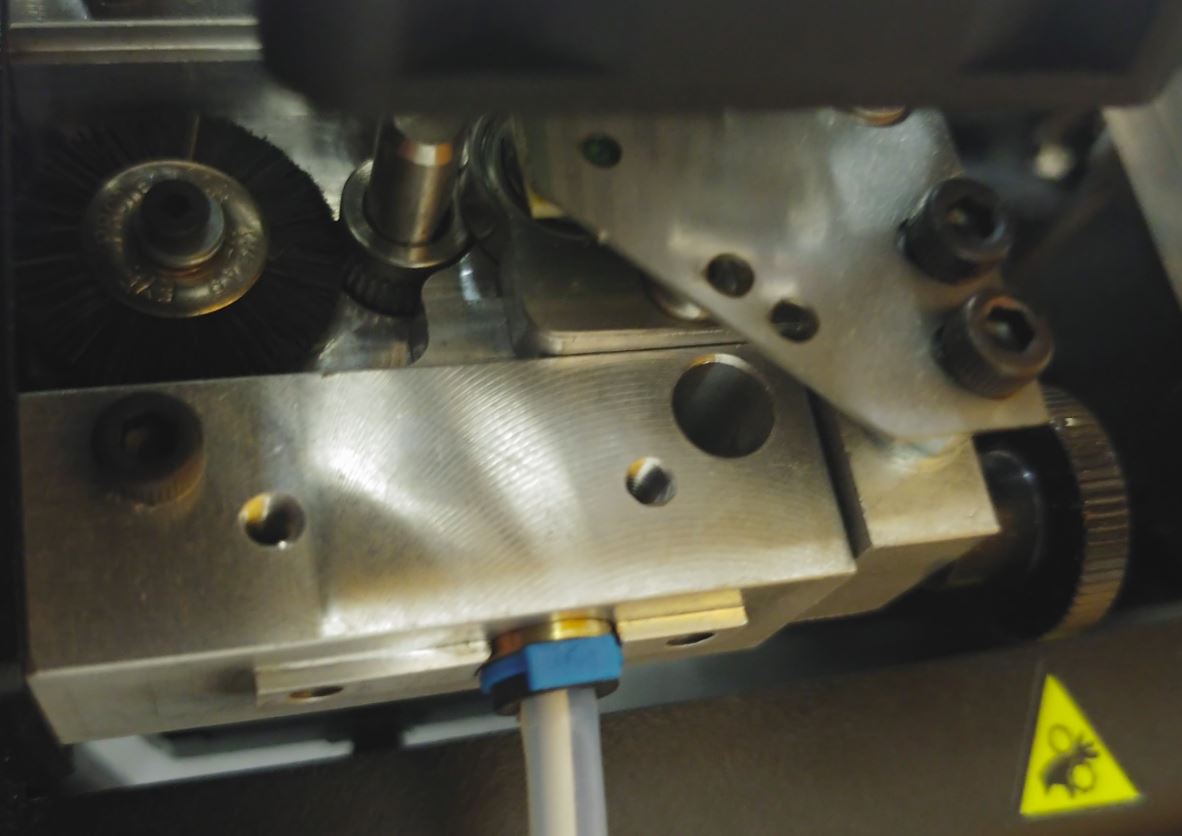
The extruder of the 3Dgence P255 3d-printer features a brush to clean the extruder gear.
For me it feels the polar opposite (ify ou mean with consumer space prebuild 3d-printer it would be a low):
None of this will be at FormNext this year as it is a business. It isn't an enthusiast/hobby convention like RMRRF. Maybe in three years, it could be in the first commercial consumer 1machines.