root

joined 1 year ago
MODERATOR OF
[–] [email protected] 2 points 1 year ago

Nice initiative.

[–] [email protected] 9 points 1 year ago

Yea, I have submitted multiple abuse emails with details to domain registrars for scamming and phishing.

Didn’t receive any update from them on any action taken yet.


In this tutorial, we will explore how to use sed (stream editor) with examples in the Markdown language. sed is a powerful command-line tool for text manipulation and is widely used for tasks such as search and replace, line filtering, and text transformations. What is described below barely scratches the surface what sed can do.

Table of Contents

  1. Installing Sed
  2. Basic Usage
  3. Search and Replace
  4. Deleting Lines
  5. Inserting and Appending Text
  6. Transformations
  7. Working with Files
  8. Conclusion

1. Installing Sed

Before we begin, make sure sed is installed on your system. It usually comes pre-installed on Unix-like systems (e.g., Linux, macOS). To check if sed is installed, open your terminal and run the following command:

sed --version

If sed is not installed, you can install it using your package manager. For example, on Ubuntu or Debian-based systems, you can use the following command:

sudo apt-get install sed

2. Basic Usage

To use sed, you need to provide it with a command and the input text to process. The basic syntax is as follows:

sed 'command' input.txt

Here, 'command' represents the action you want to perform on the input text. It can be a search pattern, a substitution, or a transformation. input.txt is the file containing the text to process. If you omit the file name, sed will read from the standard input.

3. Search and Replace

One of the most common tasks with sed is search and replace. To substitute a pattern with another in Markdown files, use the s command. The basic syntax is:

sed 's/pattern/replacement/' input.md

For example, to replace all occurrences of the word "apple" with "orange" in input.md, use the following command:

sed 's/apple/orange/' input.md

4. Deleting Lines

You can also delete specific lines from a Markdown file using sed. The d command is used to delete lines that match a particular pattern. The syntax is as follows:

sed '/pattern/d' input.md

For example, to delete all lines containing the word "banana" from input.md, use the following command:

sed '/banana/d' input.md

5. Inserting and Appending Text

sed allows you to insert or append text at specific locations in a Markdown file. The i command is used to insert text before a line, and the a command is used to append text after a line. The syntax is as follows:

sed '/pattern/i\inserted text' input.md
sed '/pattern/a\appended text' input.md

For example, to insert the line "This is a new paragraph." before the line containing the word "example" in input.md, use the following command:

sed '/example/i\This is a new paragraph.' input.md

6. Transformations

sed provides various transformation commands that can be used to modify Markdown files. Some useful commands include:

  • y: Transliterate characters. For example, to convert all uppercase letters to lowercase, use:

    sed 'y/ABCDEFGHIJKLMNOPQRSTUVWXYZ/abcdefghijklmnopqrstuvwxyz/' input.md
    
  • p: Print lines. By default, sed only prints the modified lines. To print all lines, use:

    sed -n 'p' input.md
    
  • r: Read and insert the contents of a file. For example, to insert the contents of insert.md after the line containing the word "insertion point" in input.md, use:

    sed '/insertion point/r insert.md' input.md
    

These are just a few examples of the transformation commands available in sed.

7. Working with Files

By default, sed modifies the input in-place. To make changes to a file and save the output to a new file, you can use input/output redirection:

sed 'command' input.md > output.md

This command runs sed on input.md and saves the output to output.md. Be cautious when using redirection, as it will overwrite the contents of output.md if it already exists.

8. Conclusion

In this tutorial, we have explored the basics of using sed with Markdown files. You have learned how to perform search and replace operations, delete lines, insert and append text, apply transformations, and work with files. sed offers a wide range of capabilities, and with practice, you can become proficient in manipulating Markdown files using this powerful tool.


On August 1, 2023, the free tier for the Amazon Simple Email Service (SES) will change. We are adding more features to the SES free tier: it now includes more outbound email message sources, SES’ new Virtual Deliverability Manager, and a higher limit for receiving inbound messages. We are also lowering the free tier limit for outbound messages and reducing the duration of the SES free tier to 12 months.

This may affect your bill starting in August 2023. Since you are already using SES, you will be able to take advantage of the revised free tier for another 12 months (until August 2024). Based on your SES usage in May 2023, this change would not have affected your SES bill. Note this is an estimate based on your usage, and actual billing impact may vary depending on your usage patterns each month and any discounts you may have.

The revised SES free tier offers you more flexibility. Previously, the SES free tier included up 1,000 inbound email messages per month and up to 62,000 outbound messages per month when sent from AWS compute services such as Amazon EC2. The revised free tier includes up to 3,000 messages each month. You can receive inbound messages, send outbound messages sent from anywhere (not just AWS compute services), or try Virtual Deliverability Manager, which gives you easy access to detailed metrics to explore and monitor your email delivery and engagement rates. For new SES customers, the revised free tier is available for the 12 months after you start using SES; for existing SES customers, the revised free tier is available for 12 months starting August 1, 2023.

The revised SES free tier goes live on August 1, 2023, and your account(s) will be enrolled automatically. As part of this change, you will see the label you see on your SES bill for the pricing unit for inbound messages change from “Message” to “Count” - this matches the same way we label outbound messages. We are not able to offer an option to remain on the previous SES free tier model.

To learn more about SES' deliverability tools through Virtual Deliverability Manager, please see the documentation [1]. For more details about the previous free tier, visit the pricing page [2].

If you have any questions or concerns, please reach out to AWS Support [3].

[1] https://docs.aws.amazon.com/ses/latest/dg/vdm.html [2] https://aws.amazon.com/ses/pricing/ [3] https://aws.amazon.com/support


cross-posted from: https://lemmy.run/post/19300

Author: Eashaan Dhillon

The IAF conducted Exercise 'Ranvijay' with a focus on integration and joint operations and used the Sukhoi Su-30MKI aircraft in the exercise.

The Indian Air Force, with a focus on integration, carried out Exercise ‘Ranvijay’. (Image: ANI)

The Indian Air Force carried out Exercise ‘Ranvijay’ with a focus on integration on Sunday (June 25). It was conducted from different air bases of the command headquarters of IAF in Prayagraj. The IAF conducted day and night operations with its various combat fleet including the Sukhoi Su-30MKI aircraft, a twin-engine multirole fighter aircraft developed by Russia’s Sukhoi and built under license by India’s Hindustan Aeronautics Limited (HAL).

The Sukhoi Su-30MKI aircraft is a heavy, all-weather long-range fighter. It is the most advanced fighter of the IAF after the French-made Rafale jets. The first fighter joined the fleet of the IAF in 2002, while the first aircraft assembled in India entered service with IAF in 2004.

About Indian Air Force’s Exercise 'Ranvijay’

The Central Air Command (CAC) in a statement said that the major focus of this exercise was on integrated operations while optimally exploiting the Electronic Warfare capabilities of the Indian Air Force (IAF). This exercise involved the execution of full spectrum operations by all combat assets. It will also improve the capabilities of the IAF to conduct night ops and function in all weather conditions across the globe.

"IAF UB Hills Prayagraj "Exercise Ranvijay was conducted in UB Hills and Central Air Command Area of Responsibility from June 16-23 wherein full spectrum operations by all combat assets by day and night were carried out," Central Air Command of the IAF said. "The focus was on Integrated operations while optimally exploiting electronic warfare capabilities of the Indian Air Force," CAC added. The exercise has proven that the IAF is capable of taking on challenges and protecting the nation's skies from India's adversaries with its technological capabilities. Moreover, the integration of the three tri-services will help thwart threats from India's adversaries along the Western and Northern Border.


cross-posted from: https://lemmy.run/post/19113

In this tutorial, we will walk through the process of using the grep command to filter Nginx logs based on a given time range. grep is a powerful command-line tool for searching and filtering text patterns in files.

Step 1: Access the Nginx Log Files First, access the server or machine where Nginx is running. Locate the log files that you want to search. Typically, Nginx log files are located in the /var/log/nginx/ directory. The main log file is usually named access.log. You may have additional log files for different purposes, such as error logging.

Step 2: Understanding Nginx Log Format To effectively search through Nginx logs, it is essential to understand the log format. By default, Nginx uses the combined log format, which consists of several fields, including the timestamp. The timestamp format varies depending on your Nginx configuration but is usually in the following format: [day/month/year:hour:minute:second timezone].

Step 3: Determine the Time Range Decide on the time range you want to filter. You will need to provide the starting and ending timestamps in the log format mentioned earlier. For example, if you want to filter logs between June 24th, 2023, from 10:00 AM to 12:00 PM, the time range would be [24/Jun/2023:10:00:00 and [24/Jun/2023:12:00:00.

Step 4: Use Grep to Filter Logs With the log files and time range identified, you can now use grep to filter the logs. Open a terminal or SSH session to the server and execute the following command:

grep "\[24/Jun/2023:10:00:" /var/log/nginx/access.log | awk '$4 >= "[24/Jun/2023:10:00:" && $4 <= "[24/Jun/2023:12:00:"'

Replace starting_timestamp and ending_timestamp with the appropriate timestamps you determined in Step 3. The grep command searches for lines containing the starting timestamp in the log file specified (access.log in this example). The output is then piped (|) to awk, which filters the logs based on the time range.

Step 5: View Filtered Logs After executing the command, you should see the filtered logs that fall within the specified time range. The output will include the entire log lines matching the filter.

Additional Tips:

  • If you have multiple log files, you can either specify them individually in the grep command or use a wildcard character (*) to match all files in the directory.
  • You can redirect the filtered output to a file by appending > output.log at the end of the command. This will create a file named output.log containing the filtered logs.

That's it! You have successfully filtered Nginx logs using grep based on a given time range. Feel free to explore additional options and features of grep to further refine your log analysis.

4
submitted 1 year ago* (last edited 1 year ago) by [email protected] to c/[email protected]
 

In this tutorial, we will walk through the process of using the grep command to filter Nginx logs based on a given time range. grep is a powerful command-line tool for searching and filtering text patterns in files.

Step 1: Access the Nginx Log Files First, access the server or machine where Nginx is running. Locate the log files that you want to search. Typically, Nginx log files are located in the /var/log/nginx/ directory. The main log file is usually named access.log. You may have additional log files for different purposes, such as error logging.

Step 2: Understanding Nginx Log Format To effectively search through Nginx logs, it is essential to understand the log format. By default, Nginx uses the combined log format, which consists of several fields, including the timestamp. The timestamp format varies depending on your Nginx configuration but is usually in the following format: [day/month/year:hour:minute:second timezone].

Step 3: Determine the Time Range Decide on the time range you want to filter. You will need to provide the starting and ending timestamps in the log format mentioned earlier. For example, if you want to filter logs between June 24th, 2023, from 10:00 AM to 12:00 PM, the time range would be [24/Jun/2023:10:00:00 and [24/Jun/2023:12:00:00.

Step 4: Use Grep to Filter Logs With the log files and time range identified, you can now use grep to filter the logs. Open a terminal or SSH session to the server and execute the following command:

grep "\[24/Jun/2023:10:00:" /var/log/nginx/access.log | awk '$4 >= "[24/Jun/2023:10:00:" && $4 <= "[24/Jun/2023:12:00:"'

Replace starting_timestamp and ending_timestamp with the appropriate timestamps you determined in Step 3. The grep command searches for lines containing the starting timestamp in the log file specified (access.log in this example). The output is then piped (|) to awk, which filters the logs based on the time range.

Step 5: View Filtered Logs After executing the command, you should see the filtered logs that fall within the specified time range. The output will include the entire log lines matching the filter.

Additional Tips:

  • If you have multiple log files, you can either specify them individually in the grep command or use a wildcard character (*) to match all files in the directory.
  • You can redirect the filtered output to a file by appending > output.log at the end of the command. This will create a file named output.log containing the filtered logs.

That's it! You have successfully filtered Nginx logs using grep based on a given time range. Feel free to explore additional options and features of grep to further refine your log analysis.

[–] [email protected] 17 points 1 year ago

For SysAdmin you can use [email protected].

For LinuxAdmin you can use [email protected].

I haven't found one for IT and Helpdesk yet, but I am pretty sure they are out there.


cross-posted from: https://lemmy.run/post/18241

Modi offered floral tributes and signed the visitor's book at the Cemetery that comprises the Heliopolis (Port Tewfik) Memorial and the Heliopolis (Aden) Memorial.

PM Modi pays respect to the WWI Indian soldiers.

Prime Minister Narendra Modi on Sunday visited the Heliopolis Commonwealth War Cemetery here and offered tributes to the Indian soldiers who bravely fought and laid down their lives in Egypt and Palestine during the First World War.

Modi offered floral tributes and signed the visitor's book at the Cemetery that comprises the Heliopolis (Port Tewfik) Memorial and the Heliopolis (Aden) Memorial.

The Heliopolis (Port Tewfik) Memorial commemorates nearly 4,000 Indian soldiers who died fighting in Egypt and Palestine in the First World War.

The Heliopolis (Aden) Memorial pays tribute to more than 600 men of the Commonwealth forces who sacrificed their lives for Aden during the First World War.

The Cemetery is maintained by the Commonwealth War Graves Commission. It also houses 1,700 Commonwealth burials of the Second World War as well as several war graves of other nationalities, according to the Commonwealth War Graves Commission website.

Located at the south end of the Suez Canal, the original Port Tewfik memorial was unveiled in 1926.

Designed by Sir John Burnet, the original memorial sustained damages during the 1967-1973 Israeli-Egyptian conflict and was eventually demolished, according to the Commonwealth War Graves Commission website.

In October 1980, a new memorial with panels bearing the names of the martyred Indian soldiers was unveiled by the Indian Ambassador to Egypt in the Heliopolis Commonwealth War Grave Cemetery.

Last October, External Affairs Minister S Jaishankar paid tributes at Heliopolis Commonwealth War Grave Cemetery.

The Prime Minister is on a two-day state visit to Egypt at the invitation of President Abdel Fattah El-Sisi. This is the first bilateral visit by an Indian Prime Minister in 26 years.


cross-posted from: https://lemmy.run/post/18210

The Dhansa weather station logged around 80 mm, Jafarpur and Lodi Road around 60 mm each, Ayanagar and Mungeshpur around 50 mm each and SPS Mayur Vihar 40 mm, according to the IMD

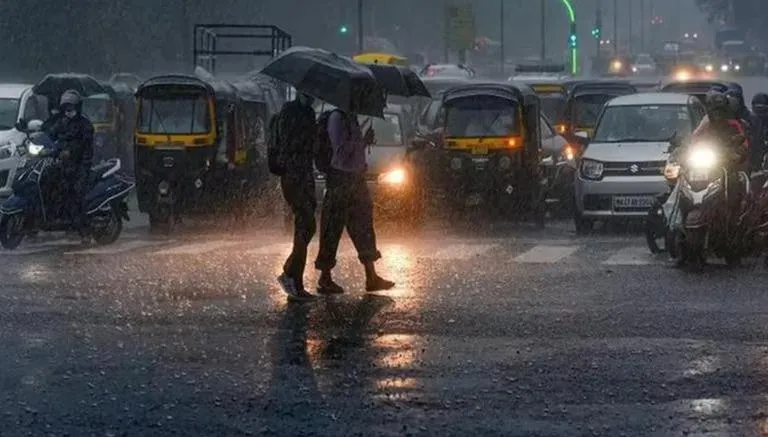
The monsoon on Sunday covered both Delhi and Mumbai together for the first time since June 21, 1961, the India Meteorological Department (IMD) said. While it hit the national capital two days before schedule, its entry into the financial capital is two weeks late, the Met office said.

"It is the first time since June 21, 1961, that the monsoon arrived in Delhi and Mumbai at the same time," said DS Pai, a senior scientist at the India Meteorological Department (IMD). The Safdarjung Observatory, Delhi's primary weather station, logged 48.3 mm rainfall in the 24 hours ending at 8.30 am on Sunday.

The Dhansa weather station logged around 80 mm, Jafarpur and Lodi Road around 60 mm each, Ayanagar and Mungeshpur around 50 mm each and SPS Mayur Vihar 40 mm, according to the IMD. The Met office termed the monsoon activity over Haryana, Chandigarh and Delhi as 'vigorous'.

According to the IMD, monsoon activity is considered 'vigorous' if the recorded rainfall is more than four times the normal or it is fairly widespread or widespread. In Mumbai, the Colaba Observatory, representative of the island city, recorded 86 mm rainfall in the 24-hour period ending at 8.30 am on Sunday while the Santacruz weather station, representative of the suburbs, registered 176.1 mm in the same period, according to the IMD.

"The southwest monsoon has further advanced into the remaining parts of Maharashtra, including Mumbai, Madhya Pradesh, Uttar Pradesh, Delhi, some parts of Gujarat, Rajasthan and Haryana, the remaining parts of Uttarakhand and most parts of Himachal Pradesh and some more parts of Jammu, Kashmir and Ladakh today (June 25)," the IMD said in a statement.

The northern limit of monsoon has now passed through Veraval, Baroda, Udaipur, Narnaul, Ambala and Katra. Conditions are favourable for further advance of the monsoon into some more parts of Gujarat, Rajasthan, Haryana, Punjab and the remaining parts of Jammu and Kashmir during the two days.

Normally, the monsoon reaches Kerala by June 1, Mumbai by June 11, and the national capital by June 27. The trajectory that the monsoon followed this year is unusual. While it covered a significant portion of north India, including Ladakh, Himachal Pradesh, Uttarakhand, and a large part of Jammu and Kashmir, on schedule or slightly ahead, it is running two weeks behind schedule for a considerable part of central India, where a significant number of farmers heavily rely on it.

Pai explained that Cyclone Biparjoy had impacted the monsoon's progress over southern India and the adjoining western and central parts of the country. He said, "Since the system absorbed most of the moisture, the monsoon's progress along the west coast was slow." However, the Bay of Bengal branch of the monsoon, responsible for bringing rain to northeast and east India, remained stronger between June 11 and June 23.

Pai attributed this to a low-pressure system that formed over the Bay of Bengal in mid-June and the remnants of Cyclone Biparjoy, which aided the monsoon's advancement over east India. Pai noted that the Arabian Sea branch of the monsoon is now gaining strength with a low-pressure system developing over the Bay of Bengal.

He said that it represents a new pulse of the monsoon and added that rapid progress is expected. According to IMD data, the monsoon reached the national capital on June 30 last year, July 13 in 2021, June 25 in 2020, July 5 in 2019 and June 28 in 2018. It hit Mumbai on June 11 last year, June 9 in 2021, June 14 in 2020 and June 25 in 2019.

This year, the monsoon arrived in Kerala on June 8, a week after its usual onset date of June 1. In comparison, it reached the southern state on May 29 last year, June 3 in 2021, June 1 in 2020, June 8 in 2019 and May 29 in 2018. Research indicates that a delay in the onset of monsoon over Kerala does not necessarily result in a delay in its arrival over northwest India nor does it impact the total rainfall over the country during the season.

The IMD previously stated that India is expected to receive normal rainfall during the southwest monsoon season despite the evolving El Nino conditions. El Nino, which is the warming of the waters in the Pacific Ocean near South America, is generally associated with the weakening of monsoon winds and dry weather in India.

The IMD's prediction of 'normal' monsoon, however, doesn't mean that each part of the country will log good rainfall during the season. It essentially means that the total rainfall will be within the normal limits though there could be excess precipitation at some places and deficient at others.

Northwest India is predicted to experience normal to below-normal rainfall while the east, northeast, central and the south peninsula regions are expected to receive normal rainfall at 94-106 per cent of the long-period average. According to the IMD, rainfall between 96 and 104 per cent of the 50-year average of 87 cm is considered 'normal'. Rainfall below 90 per cent is categorised as 'deficient', between 90 and 95 per cent is 'below normal', between 105 and 110 per cent is 'above normal' and anything above 100 per cent is classified as 'excess' precipitation.

Normal rainfall is critical for India's agricultural landscape, with 52 percent of the net cultivated area relying on it. Additionally, it plays a crucial role in replenishing reservoirs essential for drinking water and power generation throughout the country. Rainfed agriculture accounts for approximately 40 per cent of the country's total food production, making it a vital contributor to India's food security and economic stability.


cross-posted from: https://lemmy.run/post/18199

Tunnel Boring Machine will be deployed for the main tunnel under the river, while the open cut and cover method will be used for the sections of the tunnels on both ends. The length of the main tunnel will be 11.4 km, with a total length of around 15 km.

A tunnel under the mighty Brahmaputra River will finally become a reality, Assam chief minister Himanta Biswa Sarma announced on Friday. He said that the centre has approved the project, and tenders will be invited to prepare DPR for the project soon. He informed that a tunnel will be constructed under the Brahmaputra at an estimated cost of ₹6000 crore.

Addressing a public rally at Biswanath Chariali in Assam, Himanta Biswa Sarma said he thought that a tunnel under the river was just a dream, and it will not become a reality. But he was surprised during a recent visit to Delhi, where the union govt told him that the project has been greenlighted. He said that after much deliberation, it was decided that the tunnel will be constructed between Gohpur on the north bank and Numaligarh in the south bank. It will be a road cum rail tunnel.

Assam CM said that the first tenders for Detailed Project Report (DPR) will be opened on 4th July. ‘If everything goes as planned, we may be able to start the construction during the current tenure of my govt,’ he said. Sarma further said that PM Narendra Modi has already signed a file to connect the north and south banks of Brahmaputra through a tunnel. The tunnel will connect NH 15 on the north with NH 715 on the south.

The centre has entrusted NHIDCL (National Highways and Infrastructure Development Corporation Ltd.) with the project. The NHIDCL has floated tenders to prepare DPR and will start pre-construction activities for the construction of the tunnel soon. 4-lane approach roads on both ends of the tunnel are part of the project.

Tunnel Boring Machine will be deployed for the main tunnel under the river, while the open cut and cover method will be used for the sections of the tunnels on both ends. The length of the main tunnel will be 11.4 km, with a total length of around 15 km.

Artificial islands are also proposed on the northern and southern sides of the river Brahmaputra, and the construction zone will be created within the islands to facilitate the construction of the tunnel and also during the operational phase. The islands will act as bunds to prevent flood water from entering the tunnels.

NHIDCL has already prepared a Pre-Feasibility Report for the tunnel project. However, the report is only for a two-lane road tunnel and does not mention a rail tunnel. Therefore, significant changes in the DPR is expected from this report.

At present, there are six bridges over the Brahmaputra, which include twin bridges at Guwahati and Tezpur. Three more bridges at Dhubri, Guwahati and Majuli are under construction. Construction of two more bridges in Guwahati, on its eastern and western ends, will start soon, and Railway will build two bridges at Guwahati and Tezpur. Several other bridges are under the pipeline connecting the north and south banks of the Brahmaputra river across the state.

However, the bridges are seen as vulnerable in case of a war or major terrorist activities in the region, and the security establishment was considering a tunnel as an alternate route. Connectivity across the Brahmaputra is vital for the defence of the frontline on the border with China, and a tunnel is considered much more secure compared to a bridge over the river.

According to previous reports, there will be three separate tunnels, one for road, the second one for rail, and the third one for emergency use including military transport. The tunnels, including the 11.4 km long main tunnels, will be around 15 km long and will be around 32 meters below the riverbed.

The proposal for a tunnel was originally floated by the Border Roads Organization (BRO), considering its strategic importance. BRO started surveys for the project in 2014 and selected two sites, Tezpur-Nagaon and Gohpur-Numaligarh. In 2020, the centre gave in-principle approval for the project, after which detailed studies were conducted, including an airborne electromagnetic survey.

Initially, the Tezpur site was favoured, as the river is narrower there, and Tezpur is home to the headquarters of the GOC 4 Corps of the Indian Army. However, later the Gohpur-Numaligarh location was selected.

There are already two road bridges over the Brahmaputra at Tezpur, and a Railway bridge has been planned. That could be the reason for not selecting the site as both banks of the river are already well connected there. With the tunnel coming, the plan for a bridge between Gohpur and Numaligarh will be scrapped. In fact, the project was delayed because the centre was deliberating between the tunnel and the bridge, which would have been a cheaper option. The tunnel was approved after several cabinet ministers supported the plan, considering its strategic importance.

The project will be undertaken under the Special Accelerated Road Development Programme (SARDP-NE) of the Union Ministry of Road Transport & Highways.


Despite his active war-mongering and mass killing of civilians in the name of drone attacks against terror groups, Barack Obama was awarded the Nobel Peace Prize in 2009.

On Thursday (June 22), former US President Barack Obama courted controversy by virtue-signalling India about its ‘human rights’ record.

Obama, who has a notorious record as a potential war criminal, suggested that the Indian Prime Minister must be told by the Biden administration about protecting the ‘Muslim minority in a majority Hindu India.’ He also hinted at another ‘partition’ if India, under the Modi government, did not mend its ways.

The former US President made the contentious remarks during an interview with CNN news host Christiane Amanpour, just hours before PM Modi made his historic address at the joint session of the US Congress.

He said, “If President (Joe Biden) meets with Prime Minister (Narendra) Modi, the protection of Muslim minority in a majority Hindu India is something worth mentioning.”

Barack Obama also claimed, “If I had a conversation with Prime Minister Modi, then, part of the conversation would be that if you do not protect the rights of minorities, then there is a strong possibility that India at some point starts pulling apart…That would be contrary to the interests of India”

The former US President, who is now mouthing platitudes about protecting the interests of Muslims in India, has been single-handedly responsible for the death of 100s of innocent people in Muslim-majority countries.

Human rights record of ‘war monger’ Barack Obama

Barack Obama scripted history in 2008 by being the first African-American man to become the President of the United States. In 2016, he also created another record of being the only President to take the country to war during the entirety of his 8-year term.

As per a report by the ‘Bureau of Investigative Journalism’, Obama oversaw more drone strikes (54) in his first year than George W Bush did in his entire term. Prior to his Presidency, he would talk about ending ‘dumb wars’ but did the opposite when he came to power.

Barack Obama, who holds the distinction of being a Nobel Peace Prize Winner, reportedly launched airstrikes in at least seven Muslim-majority countries of Afghanistan, Yemen, Somalia, Iraq, Syria, Libya and Pakistan.

He sanctioned the use of a whopping 563 drone strikes and killed 3797 people in this process. In one instance, a CIA drone strike targeted a funeral in Pakistan, which led to the death of 41 civilians in Pakistan.

More than 89 civilians in the same country were killed by the Obama administration over the course of 128 targeted drone strikes. The US President was aware that the drone strikes were far from accurate and were increasingly leading to the death of civilians.

But this did not stop him from continuing with such attacks in Somalia (2010) and Yemen (2011). Reportedly, 21 children and 12 women (five of them being pregnant)were killed by the Obama administration’s first strike in Yemen, with the aim of targeting Al-Qaeda.

It also came to light that in 2016 alone, the US government under Obama carried out at least 26,171 bombings, which translates to 72 bombings every day on civilians in other countries.

Mass civilian casualties were also reported in Afghanistan. An average of 582 people were killed annually in Afghanistan by the US, its allies and the Afghan government in Kabul between 2007 to 2016.

The Obama administration has also been accused of conducting ‘double-tap drone strikes’, which means that the site of a drone strike is attacked again. This is despite knowing the fact that such follow-up strikes lead to the death of first responders, which is against the guidelines laid down by the 1948 Geneva Conventions.

Obama administration warmed up to Muslim brotherhood, oversaw the rise of ISIS

During the tenure of Barack Obama, the US government warmed up to the radical Islamist outfit ‘Muslim Brotherhood’ in Egypt during the Arab Spring. It was a complete departure from the approach undertaken by previous US administrations.

According to author Hany Ghoraba, Barack Obama believed that he could separate the terror outfit ‘Al-Qaeda’ and Muslim Brotherhood. “Empowering the Muslim Brotherhood would, according to Obama, weaken Al-Qaeda in a decision that can be considered as one of the severest cases of political naiveté in modern times,” he noted.

“The core fault of the Obama administration was its adoption of a false rhetoric, presented for years by Islamist activists and later liberal Western politicians and pundits, that there is a distinction between the Muslim Brotherhood and Al-Qaeda,” Ghoraba pointed out.

The Arab Spring led to significant political changes in several countries, including the ousting of long-standing autocratic leaders. In Egypt, the Muslim Brotherhood’s political arm, namely, the Freedom and Justice Party, emerged as a major political force.

In 2011, the Obama administration thought it was a great idea to engage with the Muslim brotherhood-led- government, mistaking it to be a ‘new democratic force’ and looking past its radical Islamism, dangerous ideology and its mistreatment of religious minorities.

Later when protests erupted against the government in Eqypt, the Obama administration quickly took a U-turn and called for the removal of the Muslim Brotherhood-backed-Egyptian President Mohammed Morsi. Documents now reveal that the US government funded anti-Morsi activities.

The Presidential tenure of Barack Obama was also marked by the rise of the dreaded terrorist organisation, the Islamic State of Iraq and Syria aka ISIS.

One of the major contributing factors was the withdrawal of the US troops, failed negotiations with the Iraqi government and lack of residual US military presence in the country. The security vacuum left in Iraq gave opportunities for radical Islamist groups to expand.

Conclusion

Barack Obama has been at the helm of building secret drone bases in the Middle East and Africa and increasing the deployment of warships and troops in the Western Pacific and Eastern Europe.

He has been accused by his first three Defense Secretaries at the Pentagon of micro-manging the military from the White House. Through the killing of dictator Muammar Gaddafi, Barack Obama ensured that Libya plunged into complete chaos.

Later, the oil-rich nation became a magnet for terrorist groups. Despite his active war-mongering and mass killing of civilians in the name of drone attacks against terror groups, he was awarded the Nobel Peace Prize in 2009. With the left media acting as his PR agent, Obama has been able to keep up with the false image of being a ‘great ex-President.’

At the time of PM Modi’s visit to the US on the invite of the incumbent President Joe Biden, Barack Obama is pontificating the Modi administration about human rights and peddling the distorted narrative of ‘Muslims being in danger in India.’

[–] [email protected] 2 points 1 year ago (1 children)

Hmm I didn't know about ParaFly, so something I learned today as well 😀 .


cross-posted from: https://lemmy.run/post/15922

Running Commands in Parallel in Linux

In Linux, you can execute multiple commands simultaneously by running them in parallel. This can help improve the overall execution time and efficiency of your tasks. In this tutorial, we will explore different methods to run commands in parallel in a Linux environment.

Method 1: Using & (ampersand) symbol

The simplest way to run commands in parallel is by appending the & symbol at the end of each command. Here's how you can do it:

command_1 & command_2 & command_3 &

This syntax allows each command to run in the background, enabling parallel execution. The shell will immediately return the command prompt, and the commands will execute concurrently.

For example, to compress three different files in parallel using the gzip command:

gzip file1.txt & gzip file2.txt & gzip file3.txt &

Method 2: Using xargs with -P option

The xargs command is useful for building and executing commands from standard input. By utilizing its -P option, you can specify the maximum number of commands to run in parallel. Here's an example:

echo -e "command_1\ncommand_2\ncommand_3" | xargs -P 3 -I {} sh -c "{}" &

In this example, we use the echo command to generate a list of commands separated by newline characters. This list is then piped (|) to xargs, which executes each command in parallel. The -P 3 option indicates that a maximum of three commands should run concurrently. Adjust the number according to your requirements.

For instance, to run three different wget commands in parallel to download files:

echo -e "wget http://example.com/file1.txt\nwget http://example.com/file2.txt\nwget http://example.com/file3.txt" | xargs -P 3 -I {} sh -c "{}" &

Method 3: Using GNU Parallel

GNU Parallel is a powerful tool specifically designed to run jobs in parallel. It provides extensive features and flexibility. To use GNU Parallel, follow these steps:

  1. Install GNU Parallel if it's not already installed. You can typically find it in your Linux distribution's package manager.

  2. Create a file (e.g., commands.txt) and add one command per line:

    command_1
    command_2
    command_3
    
  3. Run the following command to execute the commands in parallel:

    parallel -j 3 < commands.txt
    

    The -j 3 option specifies the maximum number of parallel jobs to run. Adjust it according to your needs.

For example, if you have a file called urls.txt containing URLs and you want to download them in parallel using wget:

parallel -j 3 wget {} < urls.txt

GNU Parallel also offers numerous advanced options for complex parallel job management. Refer to its documentation for further information.

Conclusion

Running commands in parallel can significantly speed up your tasks by utilizing the available resources efficiently. In this tutorial, you've learned three methods for running commands in parallel in Linux:

  1. Using the & symbol to run commands in the background.
  2. Utilizing xargs with the -P option to define the maximum parallelism.
  3. Using GNU Parallel for advanced parallel job management.

Choose the method that best suits your requirements and optimize your workflow by executing commands concurrently.

[–] [email protected] 3 points 1 year ago (1 children)

Haha, that is why I am glad I replaced all my contents with garbage before removing and waited for couple of days before removing them.

[–] [email protected] 4 points 1 year ago (1 children)

Seems like another good company is being sacrificed to corporate greed.

[–] [email protected] 29 points 1 year ago (9 children)

I nuked all my posts and comments.

Glad that I left the place, it can burn and go to hell for all I care.

On the other hand there’s enough constructive engagement happening here to fulfil my needs.

[–] [email protected] 2 points 1 year ago

I did not.

Thank you for sharing it. Something you learn everyday, eh 😀.

[–] [email protected] 1 points 1 year ago

Yeap, but most of the time you end up trying to figure out issue on remote system, where you don't have ripgrep always installed, but if you have that available on the system you are working on. ripgrep is always a better alternative.

[–] [email protected] 0 points 1 year ago (1 children)

Seems like you are trying to build the docker image locally for your service. And you missed the dockerfile which contains all the information about building the container.

view more: next ›