Raffowo

joined 1 year ago
[–] [email protected] 2 points 1 year ago (2 children)

Just to give some extra inspiration,

The multitouch gestire would be kinda unusable, but for scrolling I suggest to steal the same gestire from the japanese Toshiba laptops. They have a circular trackpad and for scrolling use the Edge of the trackpad with clockwise and counter-clockwise movement.

I know that I made It sound confusing, but if you see a video of that in action Will be Easy af to understand!

[–] [email protected] 2 points 1 year ago

Thats an alternative😂

[–] [email protected] 6 points 1 year ago

They are all accessibile holding the thumb buttons, they are disposed on Two separate layers.

As I mentioned on the other answer, for the full layout you can consult the github Page!

[–] [email protected] 5 points 1 year ago* (last edited 1 year ago)

That can be a bit confusing, as "a" I'm using the "Alt" on the left side (the One rotated by 90°)

On the github Page you can see the layout on the image where I mention the 40 Key layout

[–] [email protected] 1 points 1 year ago

Thank you for the feedback!

Tbh, I saw ben vallack's videos that used ergogen to build some keyboard - but I didn't put that much effort trying to learn kicad; this Will be my excuse to try that out! At the same time, Joe scotto tempted with his guide to handwiring and it felt like a breeze, but It Is a time consuming process that can lead to a lot of problems if It isn't used a good soldering iron.

Still thank you for the tip on the grid size and angles! Surely Will Speed up the process

[–] [email protected] 1 points 1 year ago

Thank you so much!

I think that atm Is in a good shape but There Is a lot more that can be done!


Hello fellow keyboard enthusiasts!

Remember the teaser I shared about the Vesuveus mechanical keyboard? Well, I'm thrilled to announce that it's no longer just a concept - it's a reality!

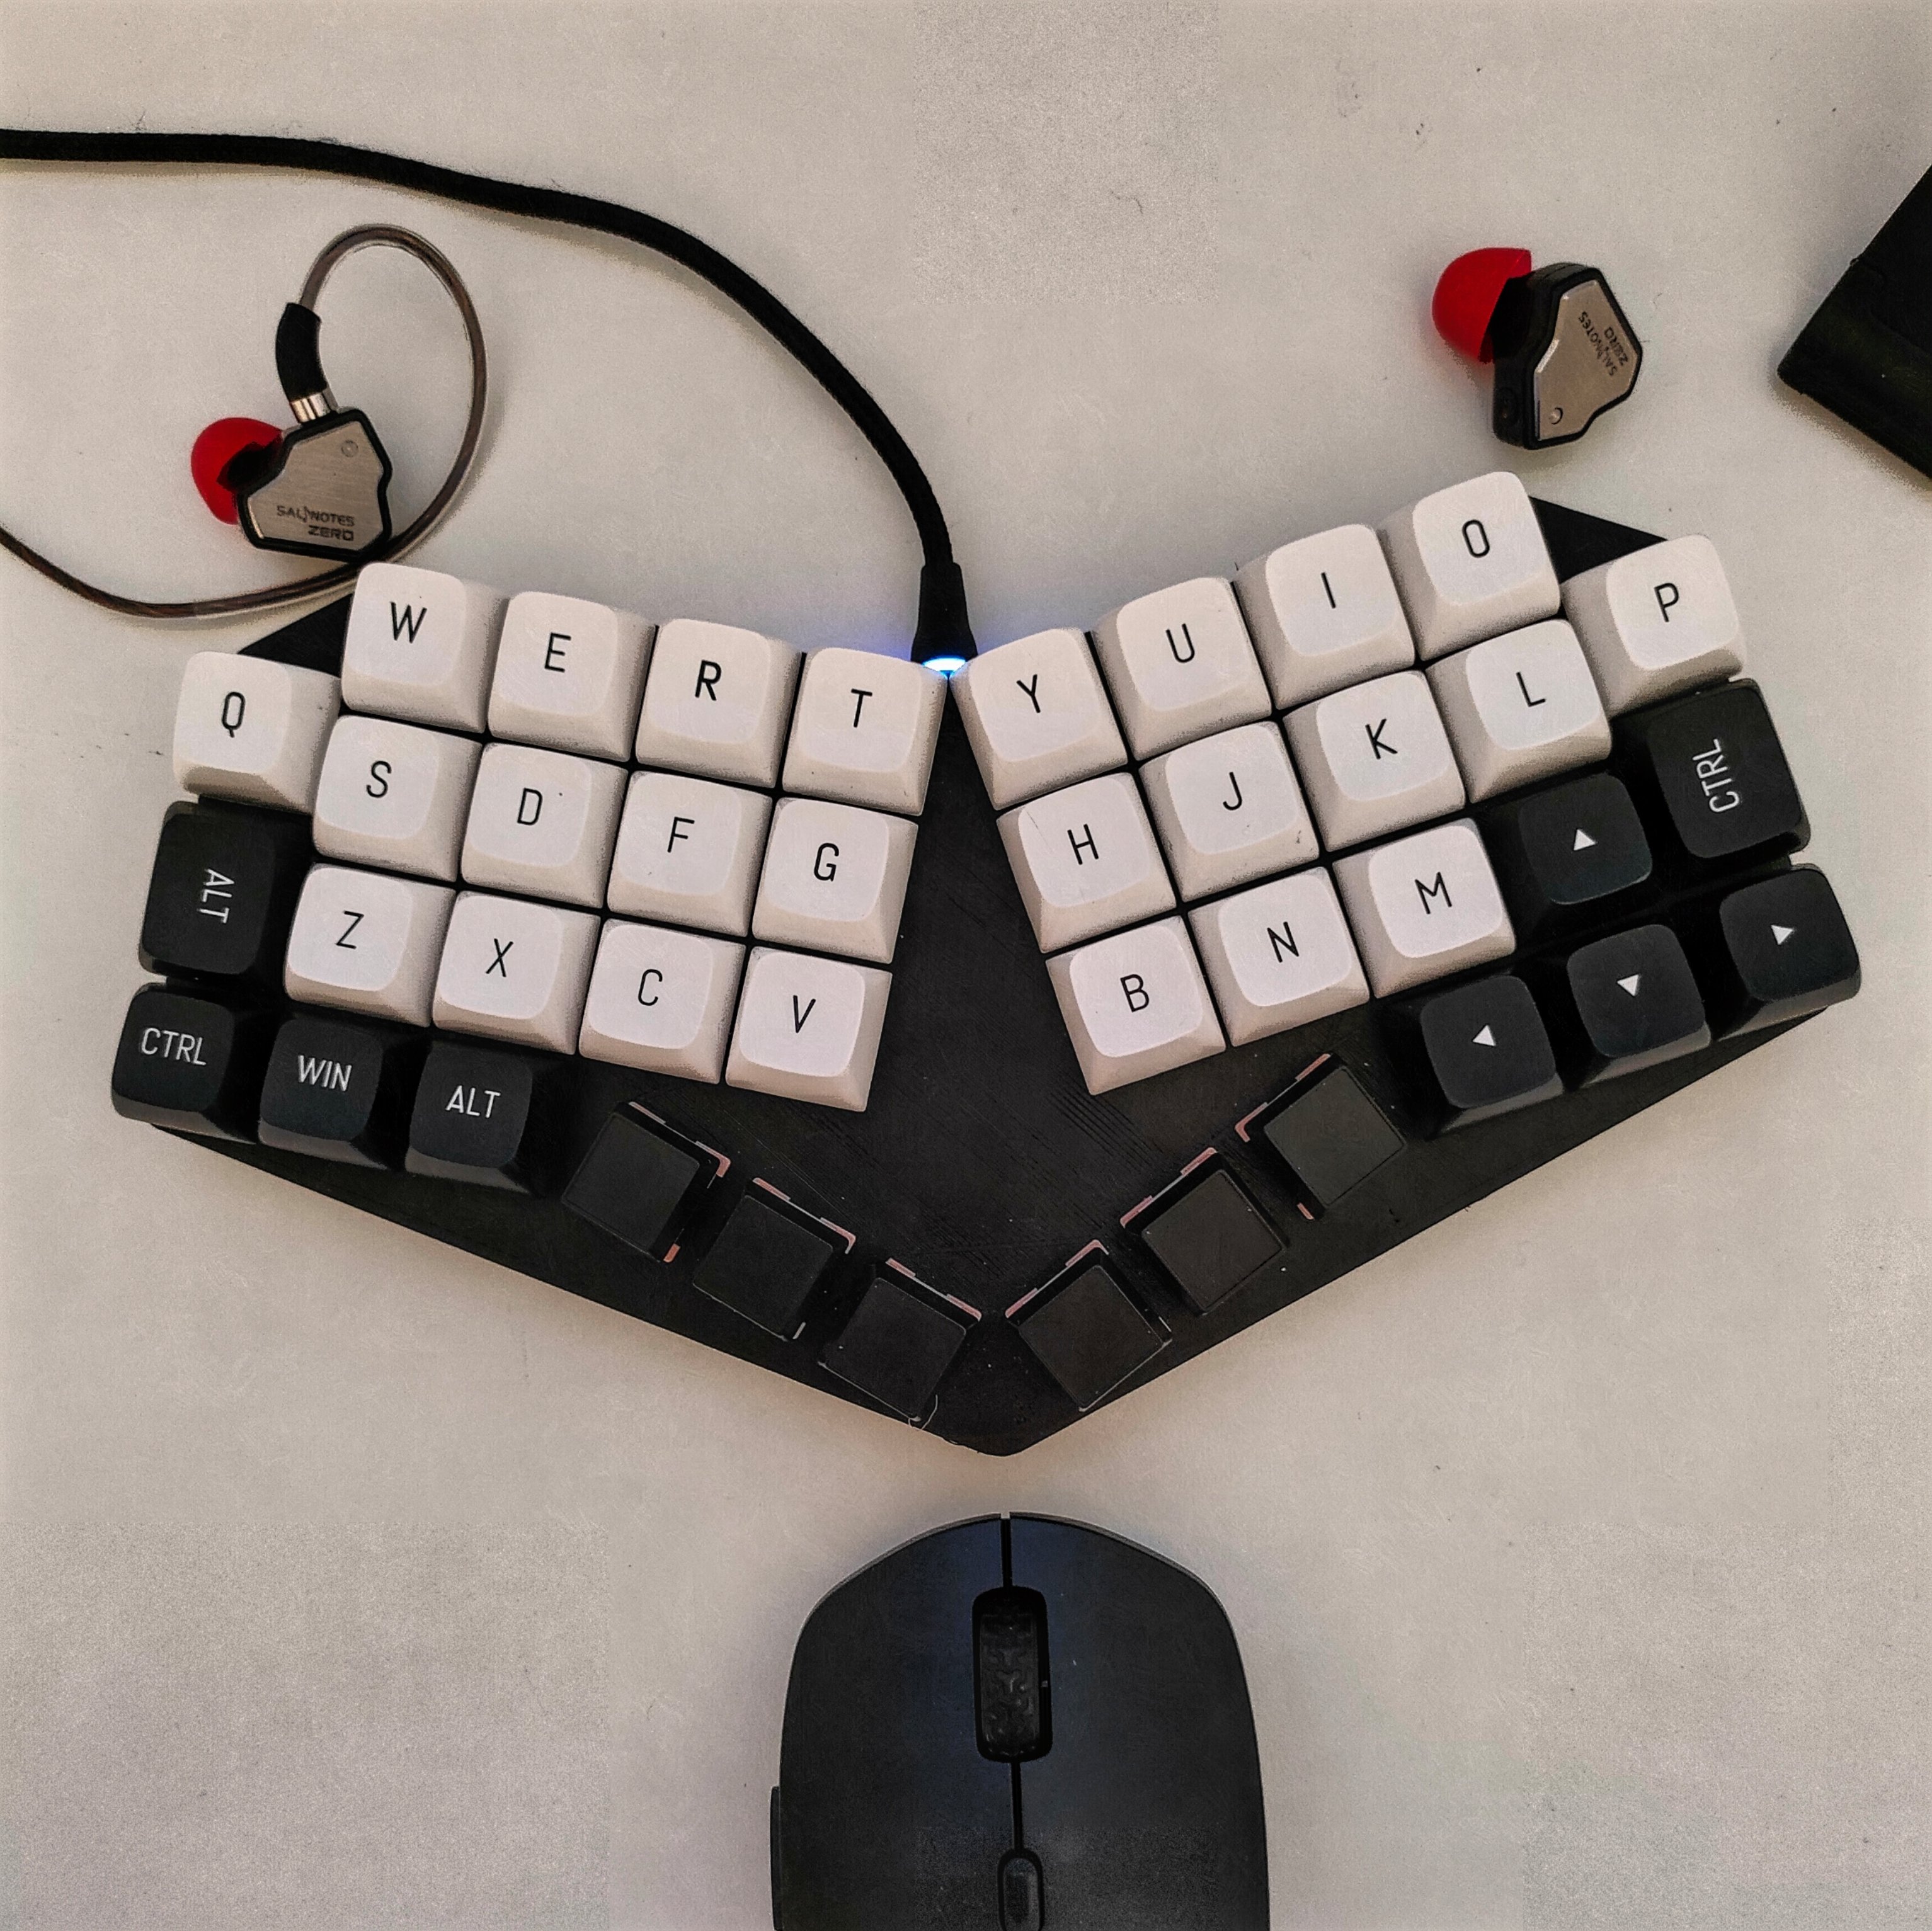
Since the initial teaser, I've been hard at work perfecting the design and building the first prototype. The white enclosure served as the starting point, but I couldn't resist experimenting further. So, recently, I had a bit of spare time that I spent fixing some issues with the first white enclosure and printed this sleek black enclosure, which model you can find on the GitHub page!

But that's not all! I've also uploaded a type test video on YouTube featuring the Vesuveus in action! You can witness the smooth, silent and satisfying keystrokes as I type away. Check it out here and let me know your thoughts!

Please keep in mind that I recorded the video with my smartphone, so the quality might not be top-notch, but I'm sure you'll still get a good idea of the typing experience with the Vesuveus. Hope you will enjoy! 😄

If you're curious to see the progress, all the details, and the newly updated 3D models, head over to the GitHub page. Feel free to explore, build your own Vesuveus, and join me in this exciting DIY mechanical keyboard journey!

ATM, the Vesuveus is a handwired board. Once I learn Kicad, I plan to work on the PCB version too! If you're interested in getting started with handwiring, I highly recommend checking out Joe Scotto's guides - that guy is amazing at what he does!

I can't express enough gratitude for the incredible support and inspiration from this amazing community. Your works has fueled my passion for keyboards, and I'm thrilled to share this milestone with all of you.

Thank you for being a part of this journey, and let's keep the keyboard magic alive together!
[–] [email protected] 1 points 1 year ago

Yeah, they look and sound good af; still i want to try the crinnacle zero

[–] [email protected] 4 points 1 year ago

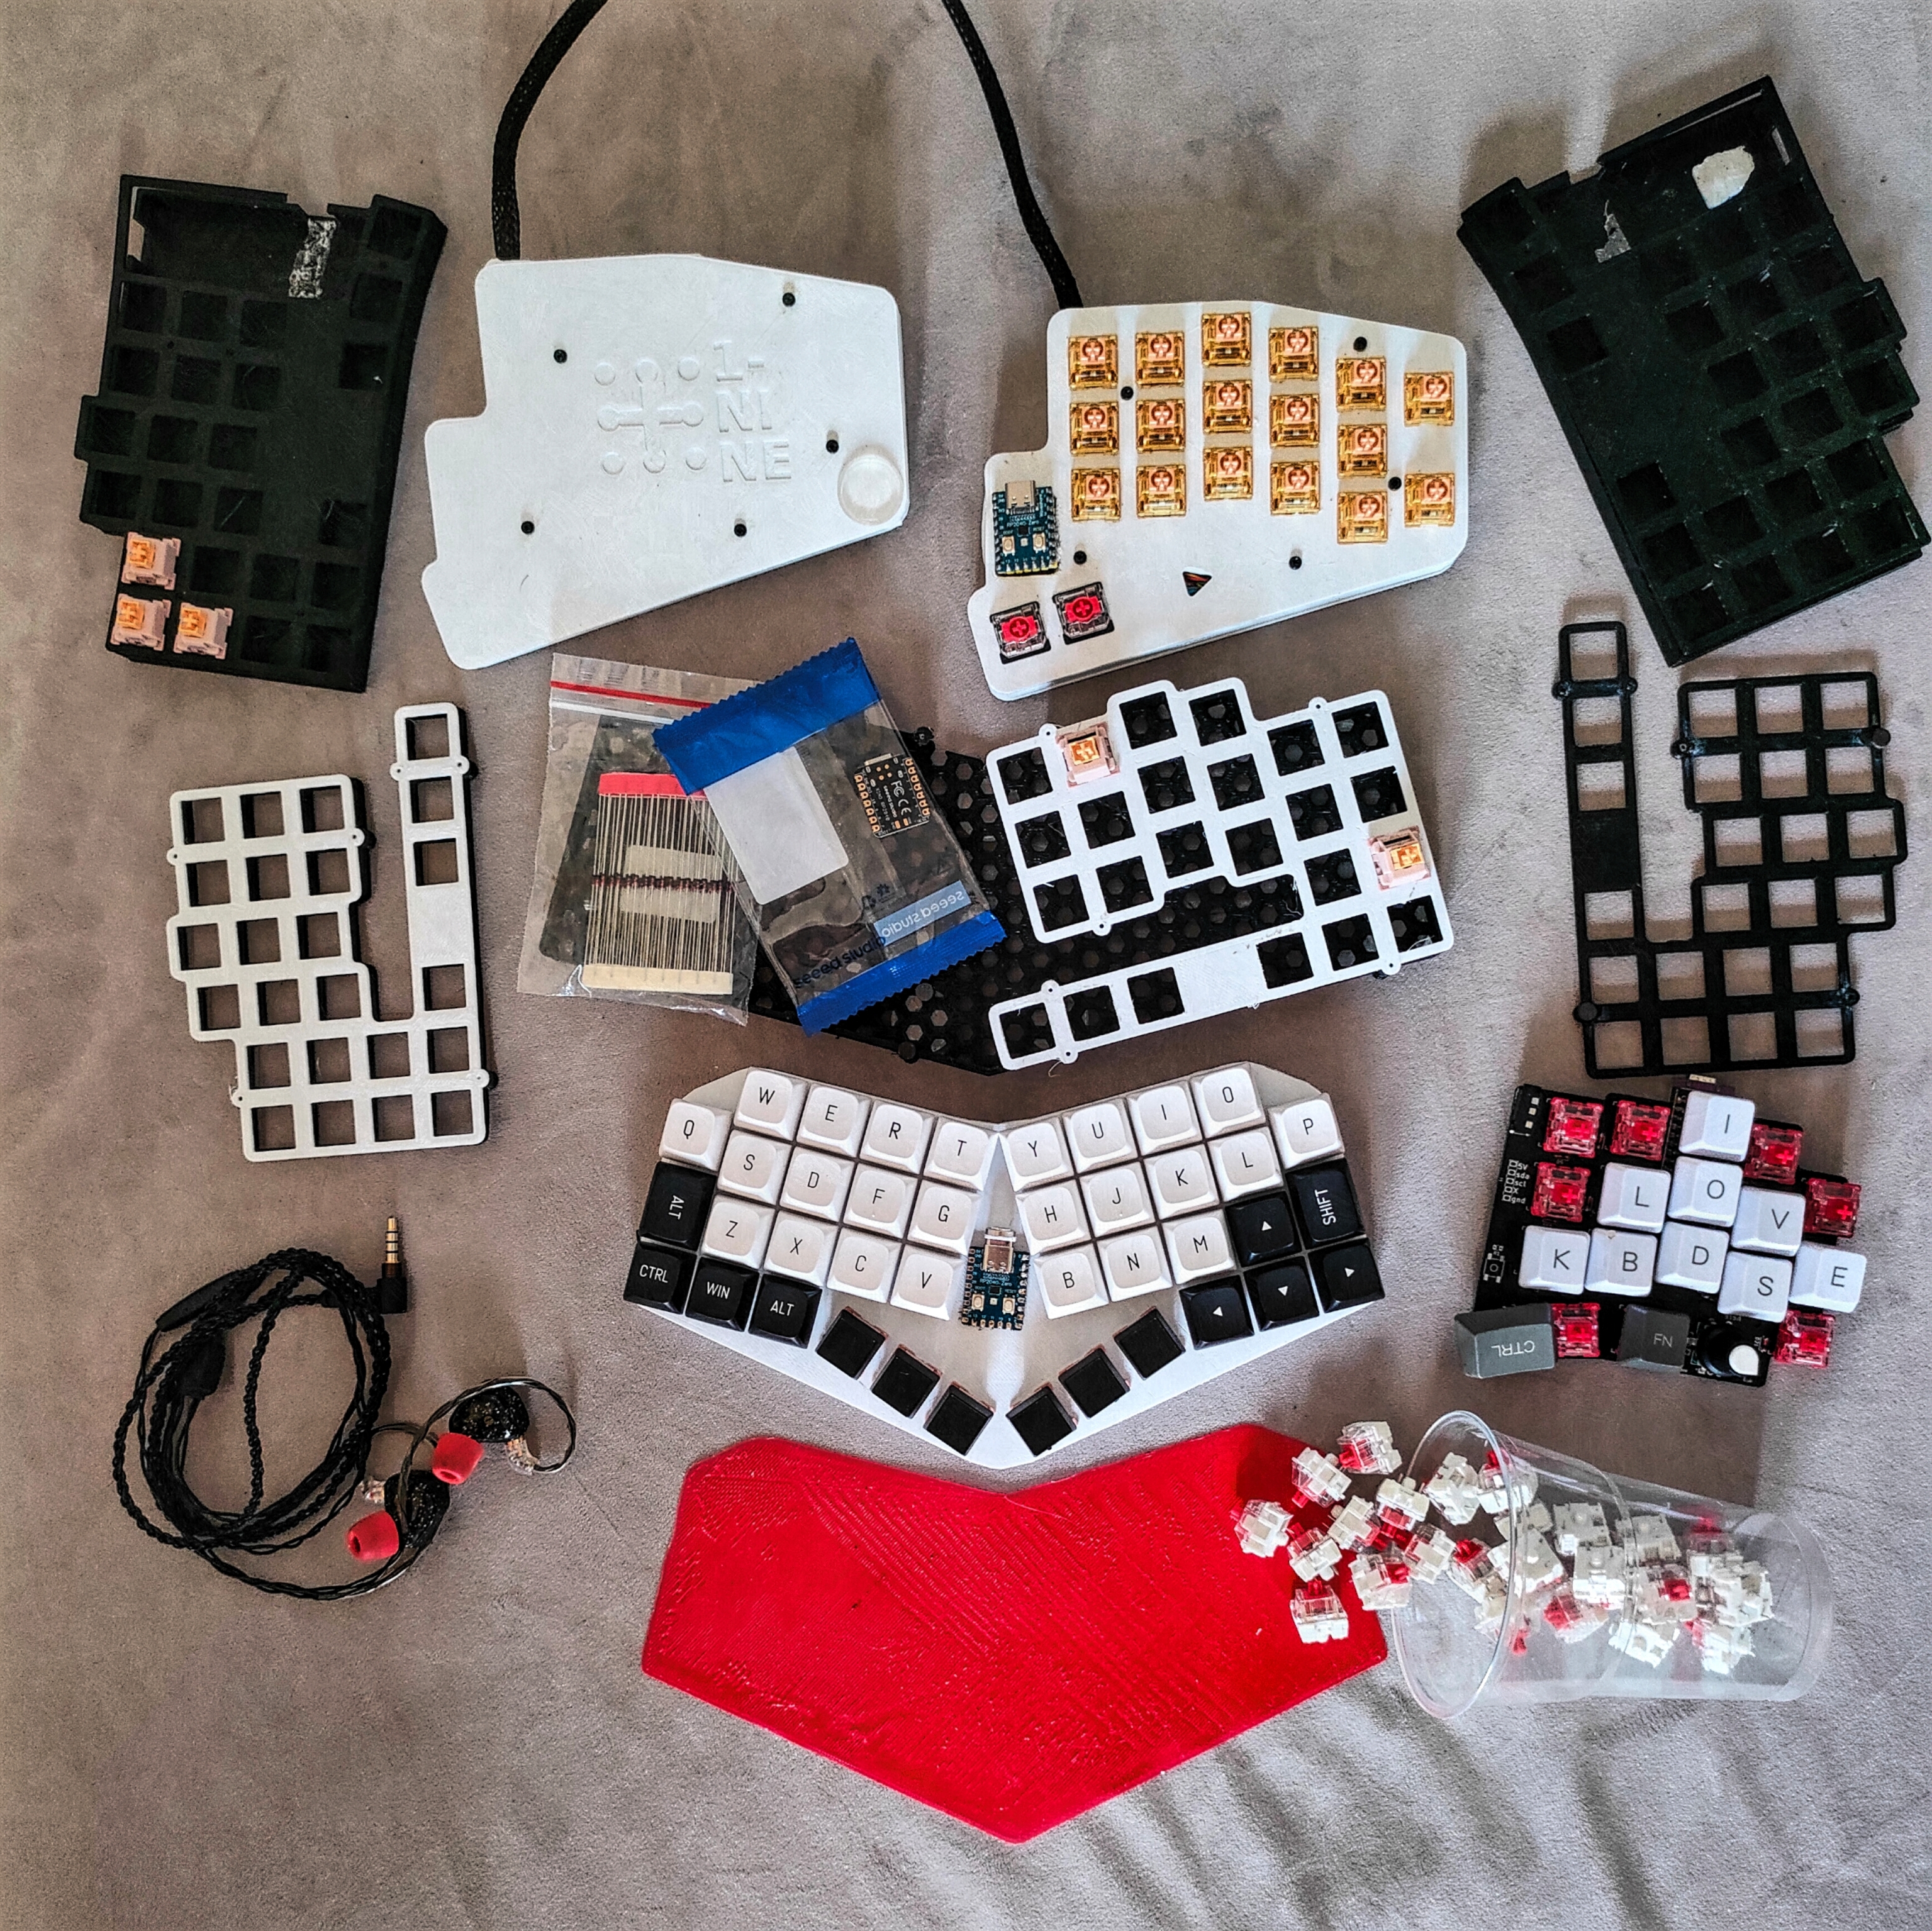
Thank you for the question, I tried a more circular low angled thumb cluster (you can see it on the top left plate) and it has its pros and cons:

As you stated the pro is the confort because our thumb movement are circular and not linear;

On the other hand the angled linear solution i found gave me the chance to fit a magnetic disc under the thumb cluster and felt more aesthetically pleasing, also because this keyboard is inspired by the little nine-nano by bsag (that has a linear thumbcluster)!

So i found that in good balance between confort, aestethic and functionality!

[–] [email protected] 6 points 1 year ago

You have mentioned two keyboards that took your attention the Piantor and the Moonlander.

So let's breakdown them, and let's see the major benefits:

  • If you have to travel a lot and dont want to spend much to try a new cup of tea, you should go for the piantor; it's cheap, really easy to build (thanks to the diodeless feature), tentable (see on the community for tentable case) and portable!

  • Instead if you don't need to travel and you are sure that you want to switch go for the moonlander; Despite it's high price it has a really large community and it's built to make the average user feel at home. With the number row, tentable, full-size mx switches; it's a really good option if you dont have to travel that much!

  • If you want a middleground of those, I can suggest the Sofle, it is a very popular keyboard too and has a number row;

This is the beauty of this community, everyone has it's preference and we love to build keebs on those!

Let us know what will you take and your feedbacks!


Hey there, fellow keyboard enthusiasts! This is my first post in this amazing community, and I couldn't be more excited to share some love and passion with all of you!

Let me take you on a quick recap of my keyboard journey and give you a sneak peek of a project that I'm incredibly proud of - the "Vesuveus."

A project inspired by all of your amazing works, and I can't wait to show you what I've been working on.

It's name /vɛˈsuːviuəs/ is derived by the volcano Vesuvius at Naples 🍕🤏.

It all began with the Ferris Sweep, a keyboard that introduced me to the world of ergonomic mechanical keyboards. Then I moved on to the bgkeeb (bottom right corner), but the 34 keys didn't quite match my workflow needs.

Next, I explored the Frame-48 layout and started designing some handwired boards. However, 48 keys felt like too many and didn't align with the ergonomic keyboard concept that I had in mind.

After numerous tests (you can see them scattered all over the place), I finally found the sweet spot - the 40-key layout. The small white board you see in the picture represents the first prototype of my project. But even though it was a great start, the thumb cluster keys were too close, and the flat, low height didn't quite fit the MCU.

So, I went back to the drawing board and made some crucial improvements. The red silhouette in the picture showcases the next version of Vesuveus. I spaced the thumb keys a bit and added a 3-degree angle to increase the height at the back, creating more room for the MCU and reducing the need for a wrist rest. And because I'm a bit of a madman, I even changed the radius of the angles because I wanted every detail to be just right.

I'm beyond thrilled to share this project with all of you, and I hope you'll find it as exciting as I do! The "Vesuveus" is all about achieving that perfect balance between usability, comfort, and design, and I'm eager to see how it will find its place in the world of mechanical keyboards.

Stay tuned for more updates and a complete reveal of the "Vesuveus" coming soon. I'm looking forward to sharing this journey with all of you and being a part of this incredible community. Thank you for having me here, and let's keep spreading the keyboard love together!

For more details and updates on the "Vesuveus" project, you can check out the GitHub repo. I've just updated the readme, and once the keyboard is ready, I'll be uploading the STL files and more information about this exciting project.


!! UPDATE: Case and plate are ready !!

  • fixed some little spacing issue on the thumb cluster, now everything clicks and clacks as should!
  • added more vertical space for the MCU (tented the back with an 3° angle) -> reduces the need of a wrist rest!

To do:

  • Firmware and layout testing!
  • Build guide (video and text)
  • Add latest build pics!