
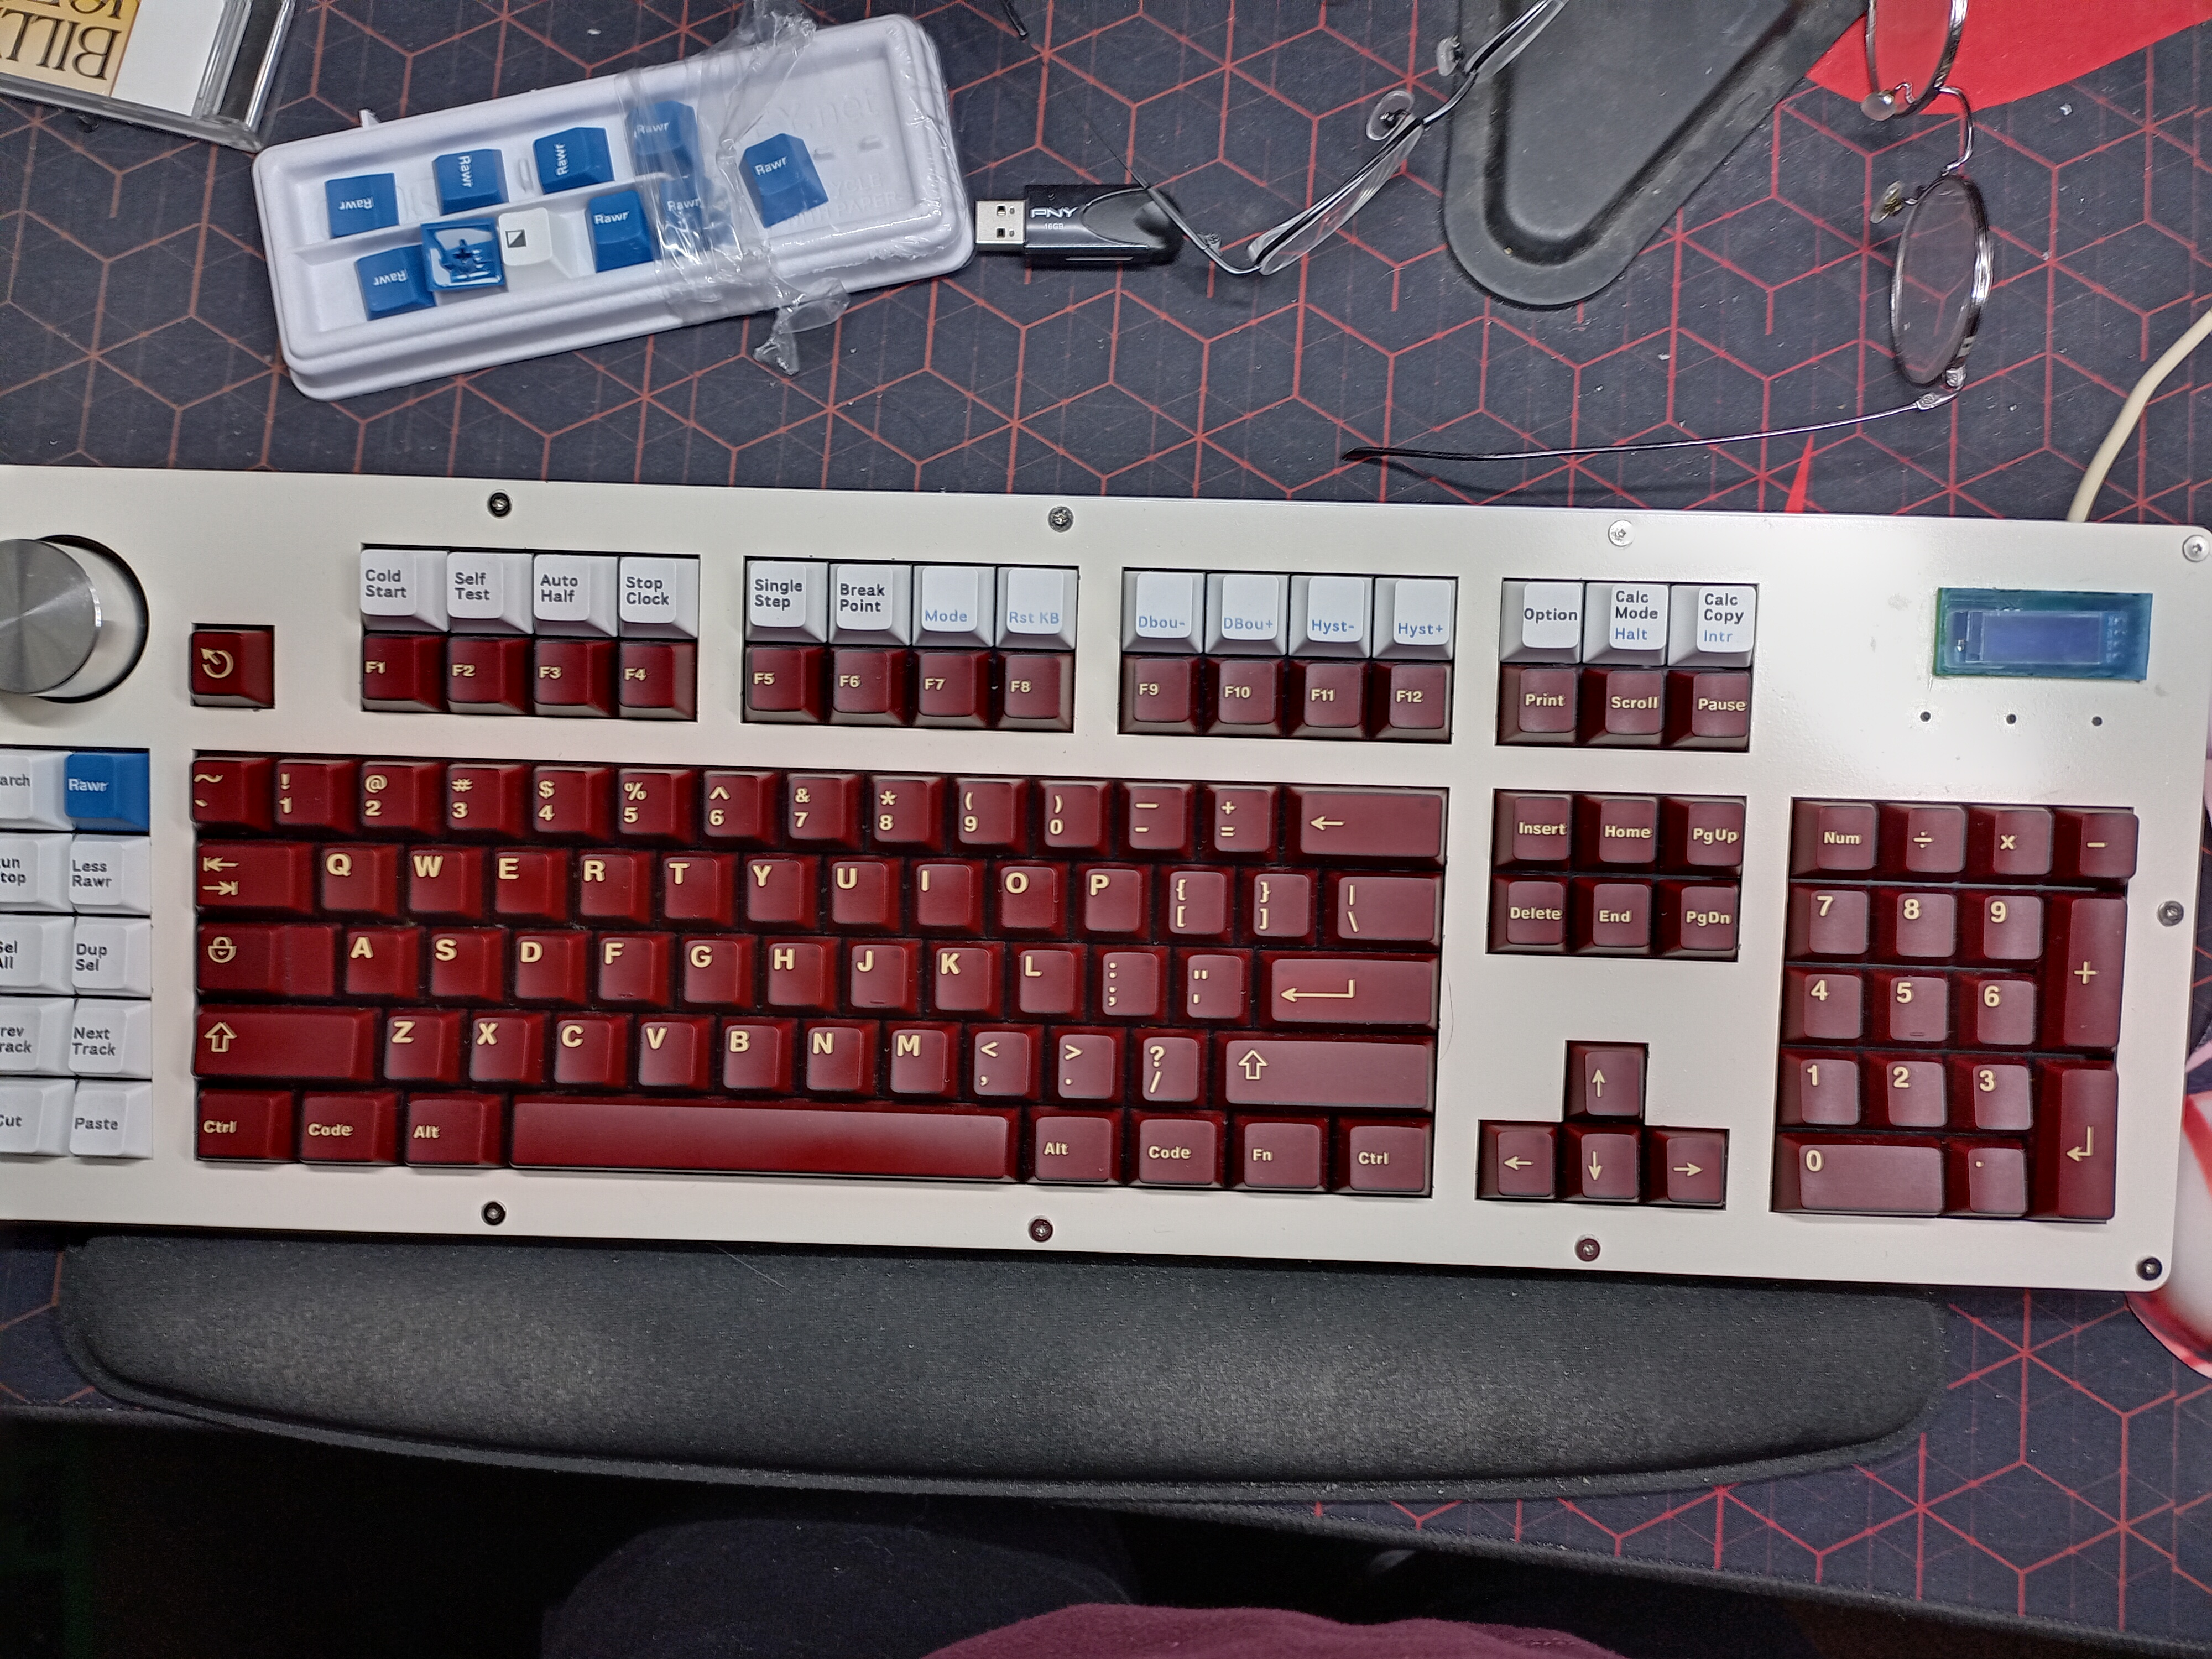
5W diode laser and Cricut brand infusible ink. I don't know how deep it penetrates, but 2% @ 45mm/s puts down a muted but easily readable legend on PBT that doesn't come off with 91% IPA or 100% acetone nail polish remover.
Are you addicted to the clicking sounds of your beautiful and impressive mechanical keyboard?
If so, this community is for you!
Here you can discuss everything about mechanical keyboards (and only mechanical keyboards).
Banner by Jay Zhang on Unsplash
5W diode laser and Cricut brand infusible ink. I don't know how deep it penetrates, but 2% @ 45mm/s puts down a muted but easily readable legend on PBT that doesn't come off with 91% IPA or 100% acetone nail polish remover.
I've had fairly decent luck with ordinary dry-erase markers and the cheap Neje engraver (possibly 1W, maybe 1.5W, I don't remember) that's basically made out of old DVD-ROM stepper motors.
I actually wore out the laser after doing a few hundred caps, so I'm waiting for a new one in the post.
One of the bigger problems is predictable mounting so if you do 10 keys in a row, they're aligned. A jig helps, like gluing a spare switch to the engraver bed.
Was definitely planning for a jig, though I hadn't got as far as planning for something to do multiple keys, and yeah, switches would be the obvious choice for mounting securely. Some sort of quick-n-dirty fabricated plate would give the type of predictable spacing that could work. Gotta get that initial placement just right, though. :-)
Obviously our engravers are pretty different models, but what sort of settings are you using, and what sort of shades are you able to pull from the dry-erase? I notice that the "cardinal" and green I was able to get were not a world apart from the old Cherry 9009 keyboards that inspired the GMK set. I also wonder if the chemical composition of Cricut's "infusible ink," at least the dye, is much different than dry-erase.
The black was by far the most reliable. Blue, red, and green were much weaker, blue probably the strongest colour.
The laser only has a "time of pulse" setting-- 6-10ms seemed enough for black, but 20+ ms did better for colours.
Following up, the white caps are lasered.
Nicely done. I hope I can get something to come out that well.
I consider myself a connoisseur of strange engineering projects, but I have to admit, I am kinda lost as to what is going on here.
Are you just etching plastic and rubbing in ink? Do you cover the plastic in ink, etch it and then wipe off excess?
(I mean this as a serious compliment: You keyboard junkies come up with some really weird shit sometimes. Strange and weird is good!)
So this is a variation on dye sublimation, one of the main ways legends are printed onto single-color keycaps. The process is basically your second idea and exactly as @Uranium_Green says.
This should cause the heat-activated ink to integrate more or less permanently to the polyester-based PBT plastic. Then I clean off the unlasered ink with isopropyl alcohol and/or acetone. The zapped ink doesn't fade at all, though as you can see it's not super vibrant.
The sweet spot to do this without charring or melting the keycap is pretty small, though though there's probably another configuration where you use higher power and quicker movement. There might also be one at even lower power and longer time. I'd seen several people try it, but with weird projects on cheap lasers you've typically got to find your own settings. Also, don't laser ABS; very bad idea.
Awesome, thank you! I could have Googled this, but it is always awesome to get information from someone who can give a better summary.
Since you are closer to the laser etching/cutting aspects than I am (I have a traditional hobby CNC machine and do a ton of 3D printing), I am curious if hight mapping has been integrated into laser etching yet. The reason I ask, is that when I cut fine pitch PCBs, I need to be at very specific depths of cut, usually within 0.1mm or so when precision is required.
Working with small curved surfaces could be problematic for maintaining the correct laser focal point? Maybe? Possibly? Even applying a generic hightmap could allow for better etching consistency IF high precision is required. If that doesn't matter, cool.
In the low-end space where I play, and I think well into the mid-range, the engraver/cutter is on a 2d gantry, basically a Core-XY 3D printer with no Z axis. I focus manually with thumbscrews and a shim. 3-axis and even 5-axis lasers exist, but I think most of them are industrial class.
I imagine it's order is:
Ink
Engrave
Wipe off excess ink.
So basically you use a little bit of ink roughly where the typeface will be, when the laser melts the plastic, some pigment will diffuse into the melted plastic, but the unmelted/undiffused stuff is still removable.
If I had to guess this is how it's actually done on the nicer older keycaps.
Though I could be entirely wrong here...
You're right. The main challenge was just zeroing in on the point where the plastic softens to let the heated ink penetrate without deforming or burning the keycap. I think there's potential here to do it better than I have, but I do think I landed on one of 2 or 3 different possible settings that will work decently well.
It's a low-rent form of dye-sublimation, and I don't know if they're using lasers, but dye-sub is one of the preferred ways to add legends to PBT keycaps.
Wow, there’s a real aesthetic to be developed! Don’t give up your idea, there’s potential here!
LOL, this is the sort of stupid thing that happens when you have ideas for nonstandard layouts but you don't type well enough to trust yourself with blank keycaps.
Oh, and for any crossover fans, the fountain pen was a a Lamy Safari with a Chinese 1.5mm stub nib and Herbin Perle Noir ink. My wife literally asked me the other day, "why aren't you into typewriters? You like every other weird old way to write stuff down."